
 Here you will find all the best coupon advice, tips and how to make the most of all your coupons!
 Are you looking for ways to stretch your dollar?


This post first appeared on Piping Rock. All content is theirs.
Looking to add Essential Oils to your daily routine? Most people have found relaxation and serenity through the practice of Aromatherapy. However, if you’re a pro you may want to vary your routine from simply using a Diffuser. Furthermore, there are many interesting and creative ways to channel your most artistic self!
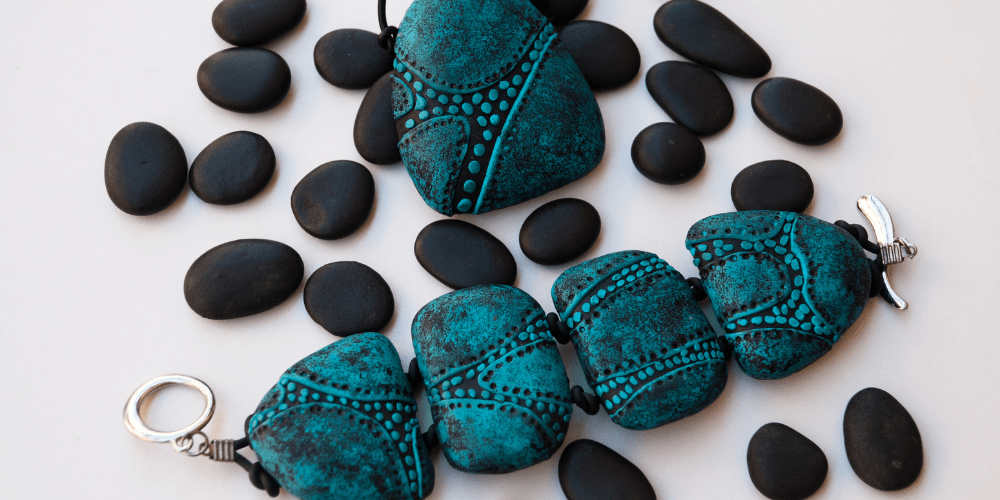
If you’re obsessed with crafting like us, you simply must try this DIY Clay Aromatherapy Jewelry… All you need is a few easily accessible items, crafting tools, Essential Oils, and your own creative passion!
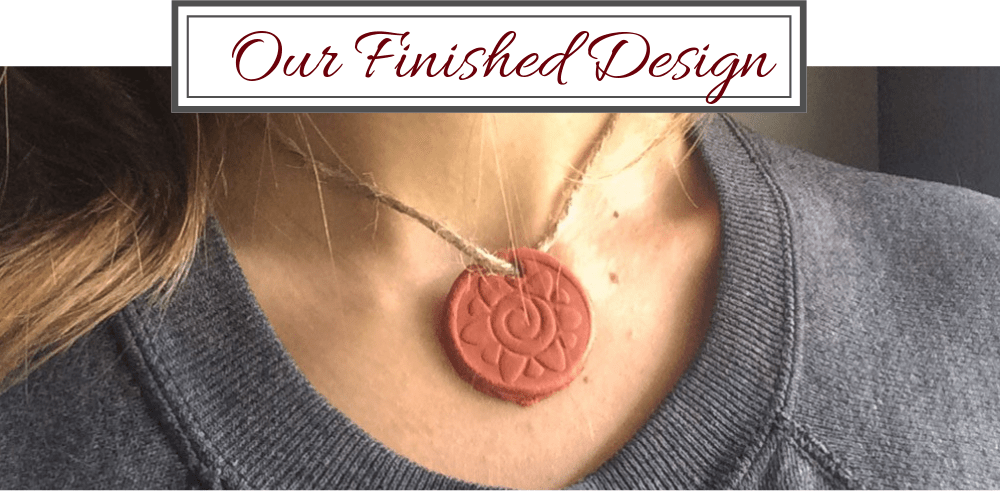
Check out our simple “How-To” below and mold your own Essential Oil Pendant Necklace! Be sure to share your unique creations with us in the comments below!
What You’ll Need:
- Air-Dry Modeling Clay (found at any local craft store!)
- Sculpting tools (Find yourself a polymer clay modeling tool or simply use toothpicks!)
- A Round Bottle Cap or Clay-Cutting Shapes (Example: The top of a small hairspray bottle)
- Stamps (Also found at any local craft store!)
- Clay Roller or anything for flattening your clay
- String or Twine (Use twine to for a more natural or earthy vibe)
- Your favorite Essential Oils (Find our Essential Oil Jewelry creations below)
7 Easy-Steps for Making Clay Jewelry:
1. Prepare the Clay:
Rip off a decent-sized chunk of clay and roll it evenly flat with your clay roller, to your desired thickness. Using the open side of your cap or clay cutter, press into the clay, forming a perfect shape. Save the scrap clay to the side, you’ll need it later. If your clay has little soft ridges you can easily smooth them out with your finger or sand the edges later when the clay has dried.
2. Stamp your Clay:
Gently press your stamp into the clay. The ridges from the stamp will help keep the Essential Oils on the pendant.
3. Carve a Hole in the Clay
Time to make the holes for your string! The tool you use for this really depends on the size of the string. We recommend using a thick Jute Twine, for a natural look and firm hold. Gently push through your pendant.
Next, take a small amount of the scrap clay from earlier and roll it into a little ball. If it’s dry and not sticking together, wet your hands a bit so it’s easier to manage.
Then, use the same tool to create a hole through the ball, creating a bead that will be used to hold the end of the necklace together. Next, allow your clay to dry. This typically takes a few hours but may take up to a whole day.
4. Add String to Necklace
Thread your string through the holes in your bead, making a tight knot. Then, thread through the pendant. Take the other end of your string and tie a loop knot. Make sure this knot is big enough for your bead to slide through, yet tight enough so it doesn’t slip out. It sounds tricky, but it’s easy!
5. Add Essential Oils
Now comes the fun part! Add 1-2 drops of your favorite Essential Oil to the front of the pendant (not the side that will be touching your skin) and gently rub into the clay.
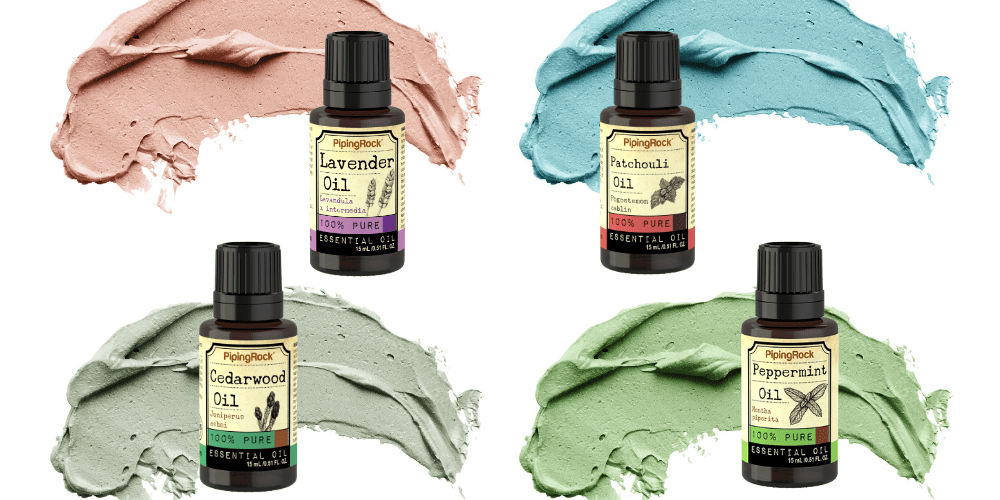
Looking for the right Essential Oil Blend to complete your Natural Clay Jewelry? Bring some passion to your project by mixing together these Essential Oil Blends below:
Our Essential Oil Blends for Clay Jewelry:
1. Diamond Focus:
This scent is a game-changer for Aromatherapy Jewelry. With a well-balanced mix of potent scents, this aroma will not go unnoticed. It’s the perfect mixture of uplifting and grounding oils to help you stay alert and centered during the toughest of weeks.
Ingredients:
Top Note: 4 Drops of Peppermint Oil
Base Note: 1 Drop of Patchouli Oil
Middle Note: 3 Drops of White Camphor Oil
Middle Note: 2 Drops of Cedarwood Oil
Directions:
Mix the drops of Essential Oil into an amber dropper bottle and shake until blended. Afterward, let sit for a few days before use.
2. Warriors Courage:
We’ve concocted a blend of all the boldest ingredients that define the toughest warrior. A combination of earthy and floral notes creates a strong scent that is both motivating and empowering. Add this Essential Oil Blend to your jewelry as you seek to conquer your goals and thrive in your pursuit of success.
Ingredients:
Top Note: 1 Drop of Lavender Oil
Base Note: 2 Drops of Cedarwood Oil
Middle Note: 3 Drops of Rosewood Oil
Middle Note: 3 Drops of Origanum Oil
Directions:
Mix the drops of Essential Oil into an amber dropper bottle and shake until blended. Afterward, let sit for a few days before use.
3. Stable Ground:
Uniting four powerful earth-elemental root oils, this blend lends the stability and calm resolve of a deeply-rooted plant. Carry this scent on your pendant to keep strong and balanced when faced with the toughest daily obstacles and external strife.
Ingredients:
Top Note: 4 Drops of Ginger Oil
Base Note: 4 Drops of Vetiver Oil
Middle Note: 2 Drops of Turmeric Oil
Middle Note: 2 Drops of Angelica Root Oil
Directions:
Mix the drops of Essential Oil into an amber dropper bottle and shake until blended. Afterward, let sit for a few days before use.
Looking for More DIY Essential Oils?
If you love these Homemade creations, there is more where that came from… We have created an Essential Oil Recipe to fit almost every ambiance you could ask for! Below are a few favorites that capture a specific vibe:
Nighttime Mood: Sweet Dreams Essential Oil
Nostalgic Memories: 3 Super Simple Perfume Recipes
Now it’s your turn to make your own Necklace, Bracelets, Pins, or any type of DIY Clay Jewelry. We’d love to see your take on this easy DIY project, so we invite you to share yours with us in the comments!
Also, feel free to make your own Essential Oil and Massage Oil creations. All it takes is a little imagination, passion, creativity, and top-notch Aromatherapy products.
Grab some Essential Oils, Carrier Oils, your own Dropper Bottle, and favorite Diffuser, and create your own projects today!
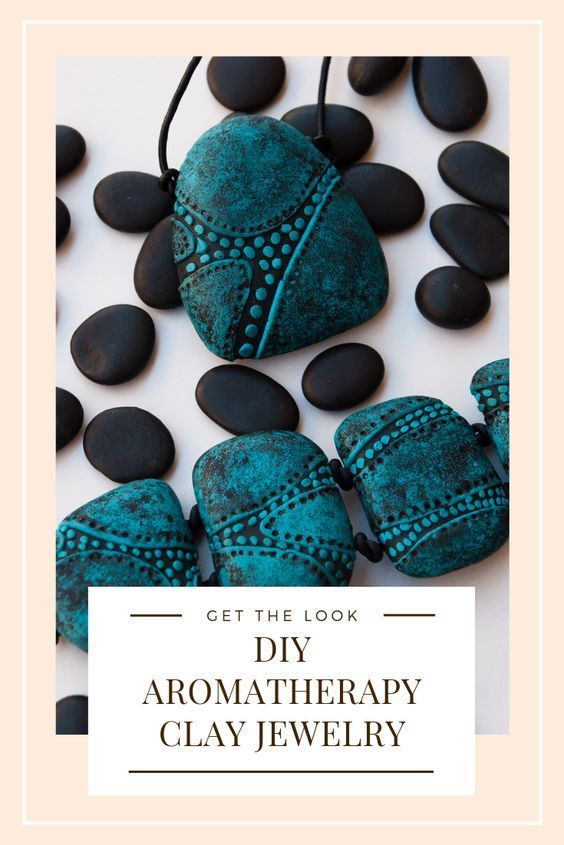
Like our Post? Pin it!