
 Here you will find all the best coupon advice, tips and how to make the most of all your coupons!
 Are you looking for ways to stretch your dollar?


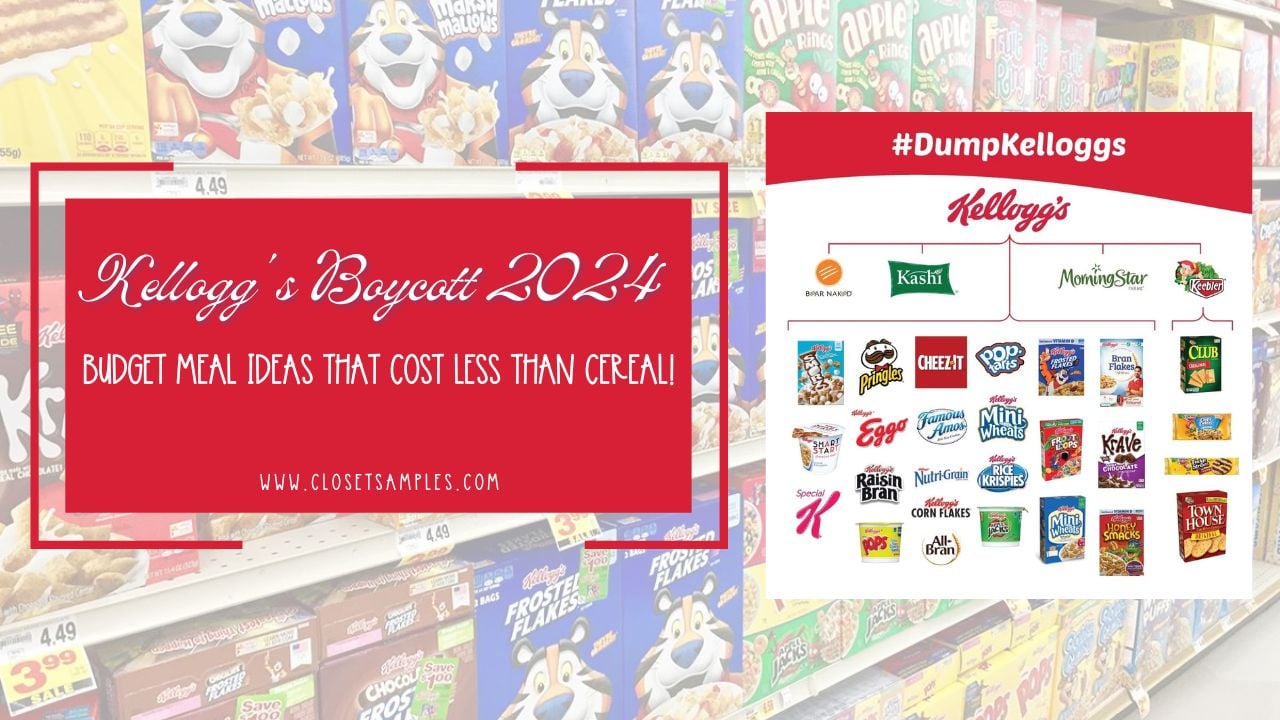

Remember that time Kellogg's CEO, Gary Pilnick, suggested folks just eat cereal for dinner if they're strapped for cash? If not, this should help remind you:
Yeah, that one. Well, people are not happy! A social media storm is brewing, and it has "Boycott Kellogg's" written all over it.
Here's the deal. Kellogg's recently hiked up their prices by a whopping 28%. Ouch! Then, Pilnick throws out this cereal-for-dinner comment. People saw it as totally out of touch, especially considering the workers' strike going on over pay and benefits.
A TikToker that I follow, named TallGirl6234, made an off-handed comment at 2 am about we should boycott and well, it sparked a boycott movement (check out her resource list here). The plan? Skip the Kellogg's for a few months, from April to June this year. The goal? To hit Kellogg's where it hurts – their wallets – and hopefully get them to lower those prices and treat their workers better.
Psst... Follow me on TikTok if you don't already!
So, what's the next bowlful for your morning routine? This boycott might have you exploring other options, and that's a good thing! Plenty of delicious and budget-friendly breakfasts are out there.
![]() “Fire is catching! And if we burn, you burn with us!”
“Fire is catching! And if we burn, you burn with us!”
- Catching Fire by Suzanne Collins.
Jump Ahead
- What brands does Kellogg's own?
- Where To Find Alternatives To Buying Kellogg's Brands
- How to make Kellogg's products at home
- Homemade Corn Flakes
- Homemade Rice Krispie Cereal
- Homemade Rice Krispie Treats
- Homemade Granola Bars
- Homemade Pop-Tarts
- Homemade Eggo Waffles
- Homemade Cinnamon Toast Crunch
- Homemade Cheese Its
- Dinner Ideas Tastier (and Cheaper) Than Cereal
- Starting a Conversation about the Kellogg's Boycott
- How To Start A Barter System From The Kellogg's Boycott
- Print Flyers
 Image credit: Pexels
What brands does Kellogg's own?
While Kellogg's is a household name synonymous with breakfast cereal, their brand portfolio extends far beyond the classic flakes and squares. They hold a dominant position in the convenient breakfast and snack category with iconic brands like Pop-Tarts, and Eggo waffles, a perennial favorite for busy mornings. Here's a breakdown of their brand portfolio by category:
| Category | Brands |
|---|---|
| Cereals | Frosted Flakes (Frosties), Rice Krispies, Special K, Krave, Cocoa Pops, Corn Flakes, Crunchy Nut, All-Bran, Nutri-Grain, Raisin Bran, Apple Jacks, Froot Loops, Mini-Wheats, Team flakes, Just Right Crunch, Trix |
Convenient Breakfasts |
Pop-Tarts, Eggo Waffles, Nutri-Grain Bars, Kellogg's Frosted Mini-Wheats Bites, Kellogg's Rice Krispies Treats |
Savory Snacks |
Cheez-It Crackers, Pringles Potato Chips |
Formerly Kellogg's - Plant-Based Options (Spun Off in 2023) |
MorningStar Farms (plant-based meat alternatives), Kashi (health-focused cereals and snacks) |
Note: This list may not be exhaustive as Kellogg's occasionally acquires and divests brands. Here are some spreadsheets as shared by users to Tallgirl6234 that she has passed along:
Image credit: Pexels
Where To Find Alternatives To Buying Kellogg's Brands
So, you're giving Kellogg's the boot? Good on you! But where do you even start for breakfast and snacks without their stuff staring you down in every aisle? Don't worry, ditching the big K is easier than you think. Here's your cheat sheet to navigate the breakfast beyond:
Store Brand Bonanza: Think of those generic brands lining the shelves? Those are your new best friends! Most grocery stores have their own versions of cereal, breakfast bars, and snacks, often at way lower prices than the name brands. Plus, they can be just as tasty. Don't be shy, grab a box and see what hidden gems you discover!
PRO TIP: Great Value does have Kellogg's products so double check these to avoid using them!
Cereal Shuffle: The cereal aisle isn't just Kellogg's playground anymore. There are tons of other brands out there like Cheerios (those little oat circles!), Honey Bunches of Oats (hello, crunchy clusters!), or Quaker Oats (the OG oatmeal people). Plus, smaller brands with unique flavors or healthier ingredients are popping up all the time. So ditch Tony the Tiger and explore the exciting world of cereal possibilities!
Granola Gang: Granola aisles are basically flavor explosions waiting to happen. Packed with nuts, seeds, oats, and dried fruit, granola is a delicious and healthy way to start your day. Many stores have their own affordable granola options, and local bakeries might even have homemade versions for a fresh twist. Just grab some milk or yogurt, and you're good to go!
Breakfast Remix: Who says breakfast has to be cereal or toaster pastries? Scrambled eggs are quick and easy, avocado toast is a trendy (and yummy) option, or even leftover dinner from the night before can be a delicious breakfast surprise. Feeling adventurous? Try some ethnic breakfasts like oatmeal with kimchi (a spicy Korean side dish) or yogurt with granola and berries. The options are endless!
Bulk Up for Savings: Warehouse clubs like Costco and Sam's Club are your friends when it comes to buying breakfast in bulk. You can snag cereals, breakfast bars, and granola at discounted prices, perfect for bigger families or cereal fanatics. Just make sure you have enough space to store that giant box of granola!
This table provides a breakdown of alternative brands by category, offering options beyond Kellogg's products:
| Category | Alternatives |
|---|---|
| Cereals | General Mills (Cheerios, Trix), Post (Honey Bunches of Oats, Fruity Pebbles), Quaker Oats (Oatmeal), Barbara's Bakery (Puffins cereal), Nature's Path (Organic cereals), Cascadian Farm (Organic cereals), Bear Naked Granola (cereal option) |
Convenient Breakfasts |
Nature Valley Granola Bars, KIND Bars, Lärabar Bars, Belvita Breakfast Biscuits, Jimmy Dean Breakfast Sandwiches (frozen section), Bob's Red Mill Oatmeal Cups |
Savory Snacks |
Pepperidge Farm Goldfish Crackers, Annie's Homegrown Cheddar Bunnies, Snyder's of Hanover Pretzels, Pirate's Booty Puffed Corn & Rice Snacks, Hippeas Chickpea Puffs |
| Plant-Based Options | Beyond Meat (plant-based breakfast sausages), Tofutti (plant-based yogurt), So Delicious Dairy Free (plant-based yogurt alternatives), Daiya (plant-based cheese alternatives) |
Stores Offering Alternatives to Kellogg's Products
| Category | Stores |
|---|---|
| National Grocery Store Chains | Walmart, Kroger, Target, Meijer, Albertsons, Safeway, Wegmans, H-E-B, Giant Eagle, Rouses |
| Warehouse Clubs | Costco, Sam's Club |
| Smaller Grocery Stores | Aldi, Lidl, Trader Joe |
Note: This is not an exhaustive list, and there are many other delicious and budget-friendly options available depending on your location and grocery store selection.
Want to help with the cause? A user on Discord made a spreadsheet for users to submit current Kellogg's prices at their local stores. You can learn more and find additional resources on theLet them Eat Cereal Discord page.

Use the No Thanks App
The Kellogg's boycott has many consumers looking for ways to avoid the company's products. The "No Thanks" app presents an interesting concept that could be helpful with the Kellogg's boycott, though in an indirect way. Here's how it works:
Barcode Scanning: The app allows users to scan product barcodes and see if the product was associated with a company the user wanted to avoid.
Indirect Boycott Help: While the "No Thanks" app specifically targeted companies related to the Israeli-Palestinian conflict, the concept has been adapted to identify other products that are on boycott as well. Users could scan Kellogg's product barcodes and be informed about the boycott, potentially encouraging them to choose alternative breakfast options.
Remember, the concept of using technology to be informed about boycotts can be helpful. There might also be alternative apps or resources available, and social communities can offer valuable support during the Kellogg's boycott. Learn more about this app from this TikToker. Also, TallGirl mentioned this app and how you can help it by adding in Kellogg's products since they are not all on there at the time of this post.
Download the app from the Google Play store and the Apple store.
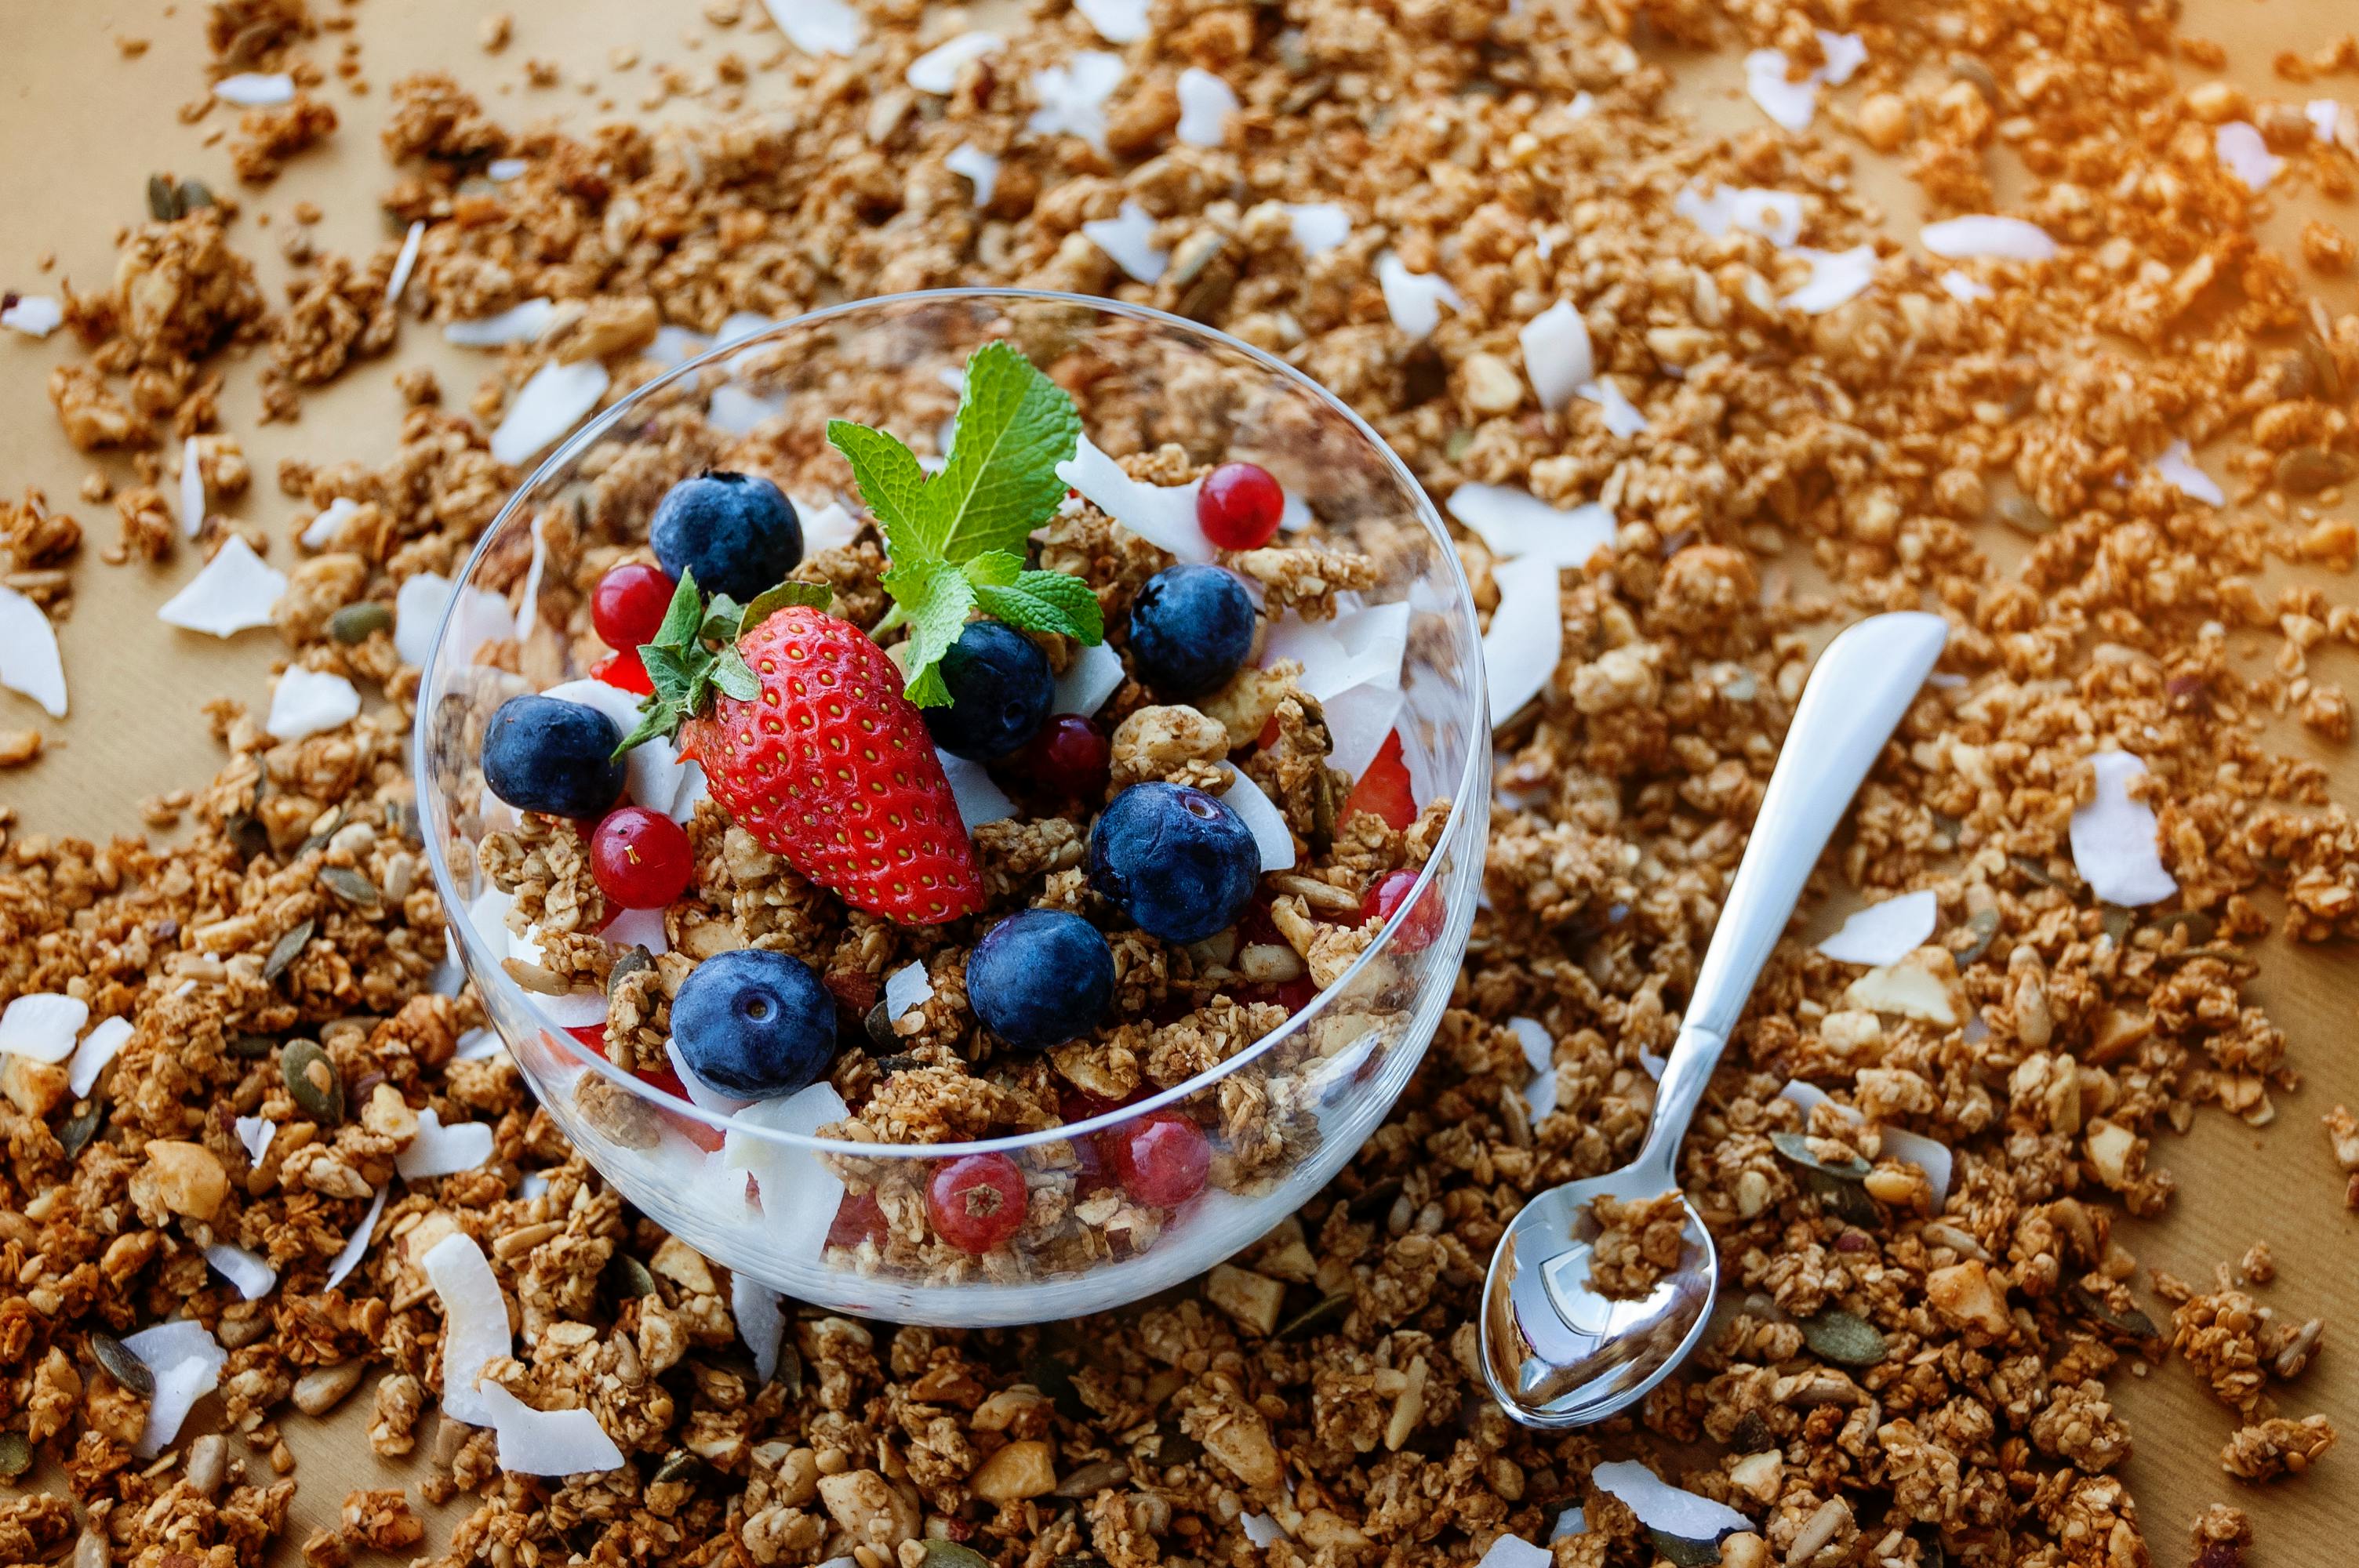
Image credit: Pexels
How to make Kellogg's products at home
While it's not possible to replicate the exact taste and texture of commercially produced Kellogg's cereals due to specialized ingredients and processes, here are some homemade options inspired by popular Kellogg's cereals:
Homemade Corn Flakes:
Ingredients:
- 1 cup cornmeal (preferably coarse ground)
- 3/4 cup water
- 1 tablespoon sugar (optional, for a touch of sweetness)
- 1/2 teaspoon salt
Instructions:
- Mix it Up: In a medium bowl, whisk together the cornmeal, water, sugar (if using), and salt. Aim for a thin, pourable batter.
- Prep the Baking Sheet: Preheat your oven to the lowest setting possible (around 200°F to 250°F). Line a baking sheet with parchment paper.
- Spread it Thin: Carefully pour the cornmeal batter onto the prepared baking sheet. Use a spatula to spread the batter into a thin, even layer. Aim for a consistency where the bottom of the baking sheet is slightly visible through the batter. The thinner the layer, the crispier the flakes will be.
- Low and Slow: Bake the cornmeal batter for 1-2 hours, or until completely dry and crisp. Keep an eye on it to prevent burning, especially at lower oven temperatures.
- Breaking Down the Flakes: Once the cornmeal sheet is completely dry and cool to the touch, use your hands to gently break it into flake shapes.
Tips:
- Flavor Boost: For a touch of extra flavor, consider adding a sprinkle of vanilla extract or a pinch of cinnamon to the batter before baking.
- Sweetness Preference: Adjust the amount of sugar to your liking. You can skip it entirely for a more savory version.
- Storage: Store your homemade corn flakes in an airtight container at room temperature for up to a week.
TIP: Alternatively, you can try this TikToker's method instead!
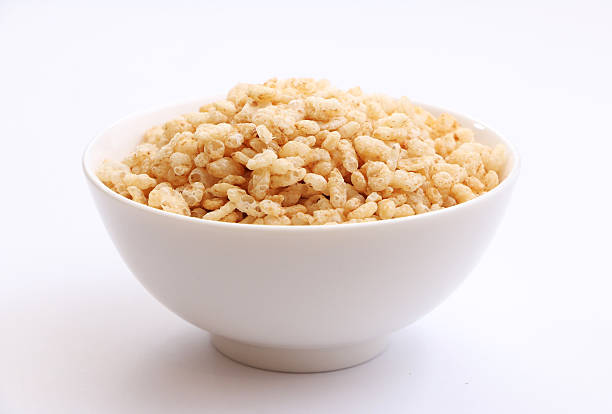
Image credit: iStock
Homemade Rice Krispie Cereal (method #1)
Ingredients:
- 1 cup cooked white rice (cooled completely)
- 1/4 cup rolled oats
- 1/4 cup all-purpose flour
- 1/4 cup granulated sugar (or less, depending on preference)
- 1/4 teaspoon salt
- 1/4 cup milk
Instructions:
- Grind it Up: In a food processor or blender, pulse the cooked rice until it breaks down into a coarse flour consistency. You may need to do this in batches depending on the size of your food processor.
- Dry Mix Magic: In a large bowl, combine the ground rice, rolled oats, flour, sugar, and salt. Whisk everything together until evenly distributed.
- Binding Time: Gradually add the milk to the dry ingredients, mixing well after each addition. Aim for a dough-like consistency that holds its shape when pinched but isn't sticky. You may need to adjust the amount of milk depending on the moisture content of your cooked rice.
- Shaping Up: Lightly flour a clean surface and roll out the dough to about 1/4 inch thickness. Use a cookie cutter or knife to cut the dough into squares or desired shapes.
- Baking Time: Preheat your oven to the lowest setting possible (around 200°F to 250°F). Line a baking sheet with parchment paper. Arrange the cut-out shapes on the prepared baking sheet, leaving some space between them for even baking.
- Low and Slow: Bake the crispy rice squares for 1-2 hours, or until completely dry and crisp. Keep an eye on them to prevent burning, especially at lower oven temperatures.
- Cooling Down: Once baked, allow the crispy rice squares to cool completely on the baking sheet.
Tips:
- Experiment with Sweetness: Adjust the amount of sugar to your liking. You can also use brown sugar for a deeper flavor.
- Flavor Boost: For a touch of extra flavor, consider adding a pinch of cinnamon or a teaspoon of vanilla extract to the dry ingredients.
- Storage: Store your homemade crispy rice squares in an airtight container at room temperature for up to a week.
Crispy Rice Flakes (Option #2)
This method creates crispy rice flakes with a slightly different texture than Rice Krispies, but still offers a delicious and healthy breakfast option.
Ingredients:
- 1 cup parboiled rice (cooked and cooled completely)
- Vegetable oil for frying
Instructions:
- Grind it Down: Using a food processor or blender, grind the cooked rice into a fine flour consistency.
- Forming the Flakes:
- Option A (Using a mold): Lightly oil a small cookie cutter or mold. Press some of the rice flour into the mold to form a thin layer. Carefully remove the shaped rice onto a plate. Repeat to form multiple flakes.
- Option B (Spreading method): Lightly oil a clean surface. Spread a thin and even layer of the rice flour onto the surface. You can use a rolling pin to achieve a more consistent thickness.
- Frying Time: Heat enough vegetable oil in a frying pan over medium heat. Once hot, carefully add the rice flakes (either individually or a small piece of the spread rice layer) to the oil. Fry for a few seconds until golden brown and crispy. Be careful not to overcrowd the pan and keep an eye on them to avoid burning.
- Drain and Cool: Using a slotted spoon, transfer the fried rice flakes to a paper towel-lined plate to drain excess oil. Allow them to cool completely before enjoying.
Tips:
- Adjust the thickness of the rice flakes for desired crispiness. Thicker flakes will take longer to cook through.
- Experiment with the frying temperature to find the sweet spot between golden brown and burnt.
- You can sprinkle a touch of cinnamon sugar on the flakes while they're still warm for added flavor.
Toasted Rice Bites (Option #3)
This option creates small, toasted rice bites that can be enjoyed as a cereal or snack.
Ingredients:
- 1 cup parboiled rice (cooked and cooled completely)
- 1 tablespoon vegetable oil
Instructions:
- Shaping Up: Using your hands, form the cooled rice into small balls or bite-sized pieces.
- Oil Coating: Lightly coat the rice balls with vegetable oil.
- Baking Time: Preheat your oven to 350°F (175°C). Line a baking sheet with parchment paper. Arrange the rice balls on the prepared baking sheet.
- Toasting Time: Bake the rice balls for 20-25 minutes, or until golden brown and slightly crispy on the outside.
- Cooling Down: Allow the rice bites to cool completely before enjoying.
Tips:
- You can add a pinch of salt to the rice before shaping for a slightly savory flavor.
- For a bit of sweetness, lightly drizzle the rice bites with honey or maple syrup after baking.
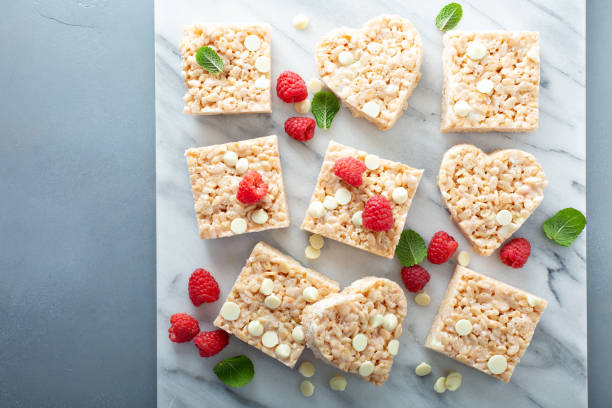 Image credit: iStock
Homemade Rice Krispie Treats:
Ingredients:
- 3 tablespoons unsalted butter
- 6 cups mini marshmallows
- 5 cups Rice Krispies cereal (use the recipe above to make your own so you don't need to buy Kellogg's!)
Instructions:
- Butter Up: In a large saucepan, melt the butter over low heat. Be patient and stir occasionally to prevent burning.
- Marshmallow Magic: Once the butter is melted and smooth, add the mini marshmallows. Increase the heat slightly to medium-low and continue stirring constantly until the marshmallows are completely melted and incorporated.
- Cereal Cavalcade: Remove the pot from the heat. Immediately pour in the Rice Krispies cereal and fold it gently with a spatula until all the cereal is evenly coated with the marshmallow mixture.
- Shaping Up: Prepare a baking dish or pan by lining it with parchment paper or greasing it lightly with butter. Pour the Rice Krispie mixture into the prepared pan.
- Press and Set: Using a buttered spatula or even damp hands (be careful, it will be hot!), gently press the Rice Krispie mixture into the pan to form an even layer.
- Cooling Down: Allow the Rice Krispie Treats to cool completely at room temperature. This can take anywhere from 30 minutes to an hour.
- Slice and Serve: Once cool and set, use a sharp knife to cut the Rice Krispie Treats into squares or desired shapes. Enjoy!
Tips:
- Marshmallow Mastery: Don't overcook the marshmallows! Once they're melted and smooth, remove them from the heat to prevent burning.
- Cereal Swaps: Feel free to experiment with different cereals! Try using puffed wheat cereal, Chex cereal, or even a combination for a unique twist.
- Flavor Fun: Add a teaspoon of vanilla extract to the melted marshmallows for a touch of vanilla flavor. You can also explore adding melted chocolate chips, sprinkles, or chopped nuts for extra flavor and texture.
- Storage: Store your homemade Rice Krispie Treats in an airtight container at room temperature for up to 3 days.
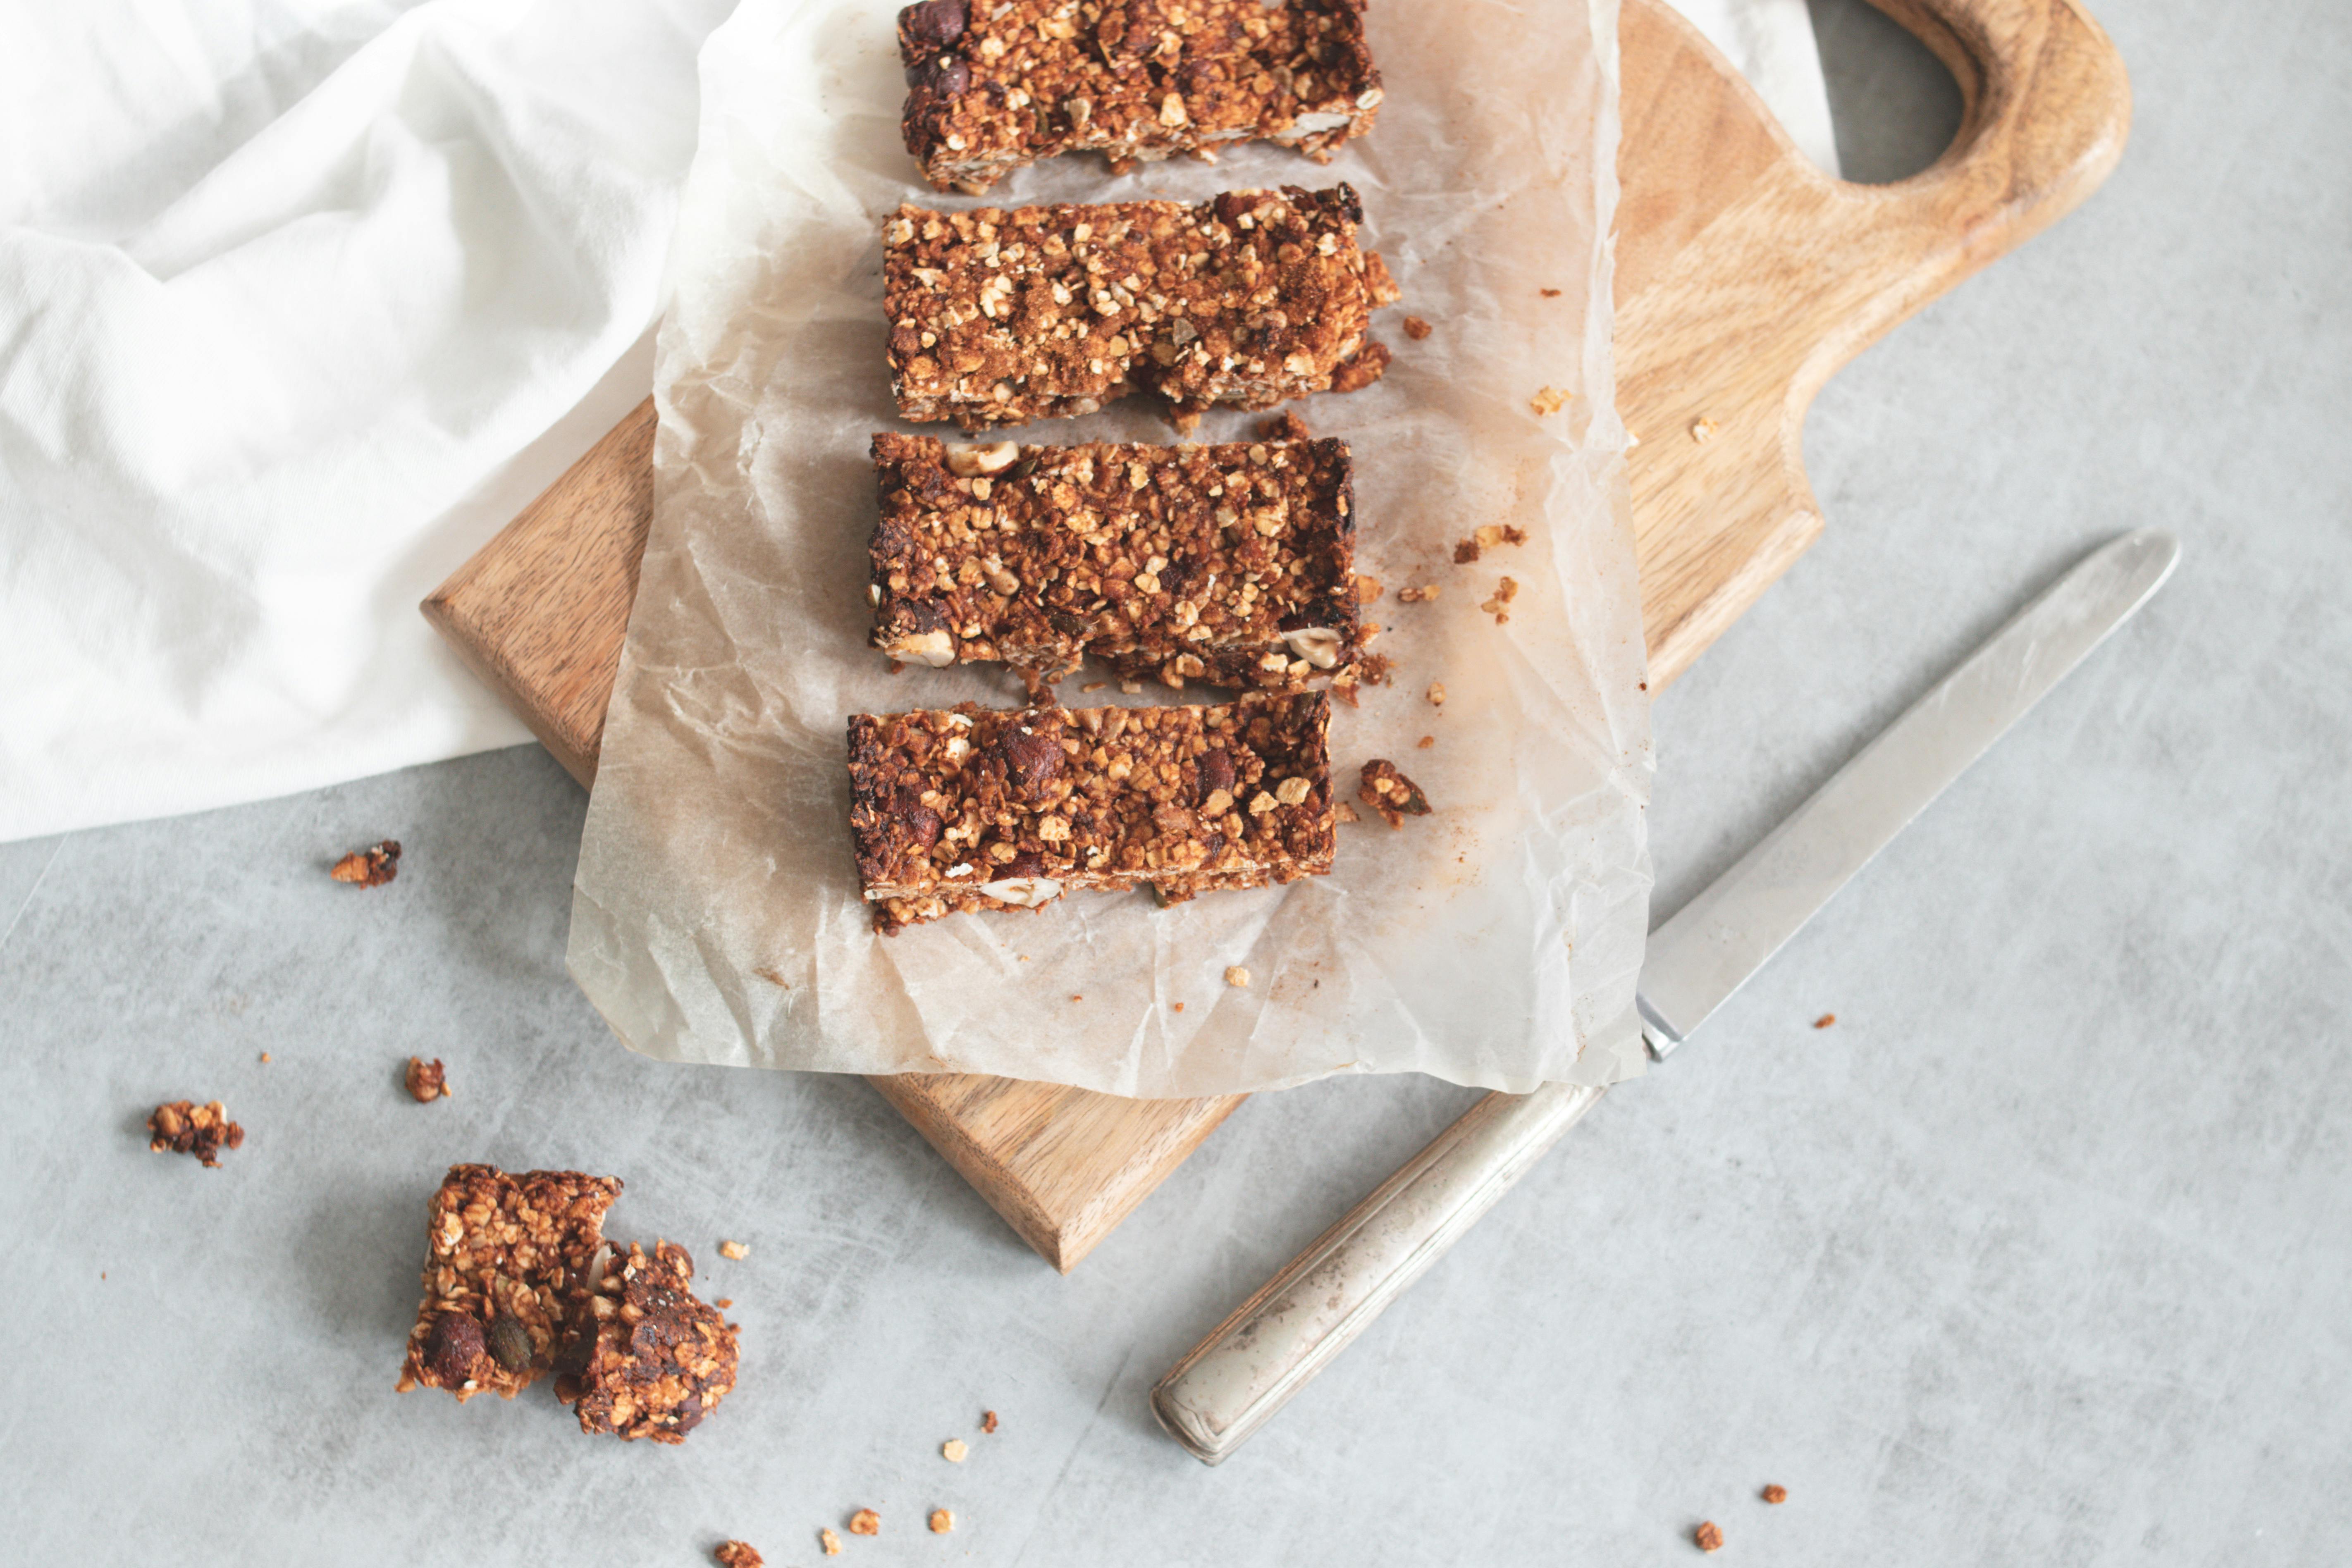 Image credit: Pexels
Homemade Granola Bars:
Ingredients:
- 2 cups rolled oats (old-fashioned oats work best)
- 1/2 cup chopped nuts (almonds, walnuts, pecans, etc.)
- 1/4 cup chopped dried fruit (raisins, cranberries, cherries, etc.)
- 1/4 cup sunflower seeds or pepitas (optional)
- 1/4 cup honey or maple syrup (adjust for desired sweetness)
- 1/4 cup melted coconut oil (or vegetable oil)
- 1/4 teaspoon ground cinnamon
- 1/4 teaspoon salt (a pinch)
Instructions:
- Preheat the Oven: Set your oven to 350°F (175°C). Line a baking sheet with parchment paper for easy cleanup.
- Dry Ingredient Mix: In a large bowl, combine the rolled oats, chopped nuts, sunflower seeds (if using), dried fruit, cinnamon, and salt. Mix well to ensure everything is evenly distributed.
- Wet Ingredient Magic: In a separate bowl, whisk together the honey or maple syrup and melted coconut oil.
- Binding Time: Pour the wet ingredients into the dry ingredient bowl and mix well until everything is coated and clumps together easily.
- Shaping Up: Transfer the granola mixture to the prepared baking sheet. Use a spatula to spread it out into an even layer, pressing down gently to ensure the bars hold their shape when cut.
- Baking Time: Bake the granola bars for 15-20 minutes, or until golden brown and fragrant. The edges may look slightly darker, but the center should still be slightly soft.
- Cooling Down: Remove the baking sheet from the oven and let the granola bars cool completely on the pan before cutting. This allows them to firm up properly.
- Cutting Time: Once cool, use a sharp knife to cut the granola bars into desired shapes (squares, bars, triangles, etc.).
Tips:
- Experiment with Flavors: Feel free to adjust the nuts, dried fruit, and spices to your liking. You can also add chocolate chips, shredded coconut, or even a sprinkle of chia seeds for extra texture and flavor.
- Sweetness Control: The amount of honey or maple syrup determines the sweetness level. Start with a 1/4 cup and taste the mixture before adding more.
- Binding Options: If the mixture feels too dry and doesn't hold together well, add a tablespoon or two of melted butter or peanut butter for extra binding.
- Storage: Store your homemade granola bars in an airtight container at room temperature for up to a week.
 Image credit: iStock
Homemade Pop-Tarts (More challenging):
Ingredients: For the Dough:
- 1 1/2 cups all-purpose flour
- 1/2 cup cold unsalted butter (cubed)
- 1/4 cup powdered sugar
- 1/4 teaspoon salt
- 1-2 tablespoons ice water
For the Filling:
- Your choice of filling (fruit jams, Nutella, nut butters, etc.)
- 1 tablespoon cornstarch (optional, to thicken runny jams)
For the Egg Wash:
- 1 egg yolk
- 1 tablespoon milk
Instructions: Make the Dough:
- In a large bowl, combine the flour, powdered sugar, and salt.
- Using a pastry cutter or your fingers, work the cold butter into the dry ingredients until it resembles coarse crumbs.
- Gradually add ice water, one tablespoon at a time, until the dough just comes together. Be careful not to overmix.
- Wrap the dough in plastic wrap and refrigerate for at least 30 minutes (or up to an hour) to chill and firm up.
Prepare the Filling:
- If using a runny jam, mix it with 1 tablespoon of cornstarch to thicken it slightly and prevent it from oozing out during baking.
- If using other fillings like Nutella or nut butters, you can use them as is.
- Preheat the Oven: Preheat your oven to 400°F (200°C). Line a baking sheet with parchment paper.
- Roll Out the Dough: On a lightly floured surface, roll out the chilled dough to about 1/8 inch thickness. The dough can be a bit tricky to handle, so be patient and use enough flour to prevent sticking.
- Cut Out Shapes: Use a sharp knife or a pastry cutter to cut out rectangles of your desired size. A standard Pop-Tart is around 3x4 inches.
Prepare the Filling & Egg Wash:
- Spoon a tablespoon or two of your chosen filling onto one half of each dough rectangle.
- In a small bowl, whisk together the egg yolk and milk to create an egg wash.
Seal the Deal:
- Brush the edges of the dough rectangle with the egg wash.
- Carefully fold the other half of the dough over the filling to create a rectangle.
- Use a fork to crimp the edges of the dough to seal it shut. Make sure the seal is tight to prevent the filling from leaking out.
Egg Wash & Bake:
- Brush the tops of the pop-tarts with the remaining egg wash. This will give them a nice golden brown color after baking.
- Using a sharp knife, poke a few small holes in the top of each pop-tart to allow steam to escape during baking.
Baking Time: Bake the pop-tarts for 15-20 minutes, or until golden brown and the filling is bubbly.
Cooling Down: Remove the pop-tarts from the oven and let them cool completely on a wire rack before frosting (if desired).
Frosting (Optional):
- You can make a simple glaze with powdered sugar, milk, and a touch of vanilla extract.
- Spread the glaze over the cooled pop-tarts for an extra layer of sweetness.
Tips:
- If the dough is too crumbly when rolling out, try adding a teaspoon of ice water at a time until it becomes pliable.
- Don't overfill the pop-tarts, or the filling might leak out during baking.
- You can experiment with different fillings and frostings to create your own unique flavor combinations.
TIP: You can also try this TikToker's method or search for other methods. This TikToker made a S'mores poptart!

Image credit: Pexels
Homemade Eggo Waffles (Similar, but not identical):
Ingredients:
- 1 ½ cups all-purpose flour
- 2 tablespoons sugar
- 2 teaspoons baking powder
- ½ teaspoon salt
- 1 ¼ cups buttermilk (or milk with 1 tablespoon vinegar or lemon juice added)
- 2 eggs
- ¼ cup melted butter
Instructions:
- Dry Mix Magic: In a large bowl, whisk together the flour, sugar, baking powder, and salt.
- Wet Ingredients Unite: In a separate bowl, whisk together the buttermilk, eggs, and melted butter.
- Just Combined is Key: Don't overmix! Gently pour the wet ingredients into the dry ingredients and stir just until combined. A few lumps are okay – overmixing can lead to tough waffles.
- Preheat Your Iron: Preheat your waffle iron according to the manufacturer's instructions. Most waffle irons will have an indicator light to tell you when it's ready to use.
- Batter Up! Pour a scoop of batter (amount will vary depending on your waffle iron size) onto the center of the preheated waffle iron. Close the lid and cook according to your waffle iron's instructions. This will typically be around 3-4 minutes, or until golden brown and cooked through.
- Waffley Goodness: Carefully open the waffle iron and remove the cooked waffle. Place it on a wire rack to keep it crisp. Repeat with the remaining batter.
- Serving Time: Enjoy your homemade waffles warm with your favorite toppings like maple syrup, butter, fresh fruit, whipped cream, or even chocolate chips!
Tips:
- Buttermilk Option: Buttermilk adds a slight tang and tenderness to the waffles. If you don't have buttermilk, you can make your own by adding 1 tablespoon of vinegar or lemon juice to 1 ¼ cups of milk and letting it sit for 5 minutes before using.
- Non-Stick Delight: For easier waffle removal, preheat your waffle iron with a little bit of cooking spray to create a non-stick surface.
- Leftover Love: Let leftover waffles cool completely and store them in an airtight container at room temperature for up to 2 days. You can reheat them in a toaster or toaster oven for a quick and delicious breakfast.
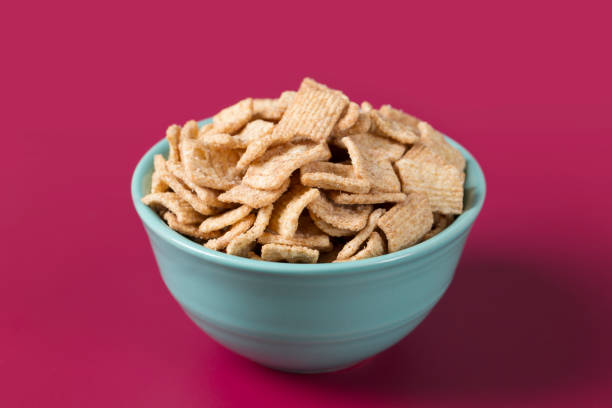 Image credit: iStock
Homemade Cinnamon Toast Crunch:
Ingredients: For the Cereal:
- 2 cups rolled oats
- 1 cup all-purpose flour (or whole wheat pastry flour for a more nutrient-rich option)
- 1 tablespoon ground cinnamon
- ¼ cup granulated sugar
- ½ teaspoon salt
- ½ cup cold, unsalted butter (cubed)
- ½ cup cold water (or milk, for a slightly richer flavor)
- 1 teaspoon vanilla extract (optional)
For the Cinnamon Sugar Coating:
- ¼ cup granulated sugar
- 1 tablespoon ground cinnamon
Instructions:
- Preheat the Oven: Set your oven to 350°F (175°C) and line a baking sheet with parchment paper.
- Dry Mix Magic: In a large bowl, whisk together the rolled oats, flour, cinnamon, sugar, and salt.
- Cutting in the Butter: Using a pastry cutter or your fingers, work the cold butter cubes into the dry ingredients until the mixture resembles coarse crumbs.
- Binding Time: Gradually add the cold water (or milk) and vanilla extract (if using) to the mixture, one tablespoon at a time. Stir with a fork or spatula until just combined. The dough should be slightly moist and hold its shape when pinched. Be careful not to overmix.
- Shaping Up: Turn the dough out onto a lightly floured surface and gently knead it a few times to bring it together. Roll out the dough to an even thickness of about ¼ inch.
- Cutting Time: Use a knife or cookie cutter to cut the dough into desired shapes. Squares or rectangles are classic Cinnamon Toast Crunch shapes, but feel free to get creative!
- Sprinkle with Spice: In a small bowl, combine the ¼ cup sugar and 1 tablespoon of cinnamon to create your homemade cinnamon sugar. Sprinkle the cinnamon sugar generously over the top of the cut-out dough shapes.
- Baking Time: Carefully transfer the dough pieces to the prepared baking sheet, leaving some space between them for even baking. Bake for 15-20 minutes, or until golden brown and slightly crisp.
- Cooling Down: Once baked, remove the cereal pieces from the oven and let them cool completely on the baking sheet before storing or enjoying.
Tips:
- Adjust the Sweetness: If you prefer a less sweet cereal, reduce the amount of sugar in both the dough and the cinnamon sugar topping.
- Play with Flavor: Feel free to add a pinch of nutmeg or a teaspoon of honey to the dough for a touch of extra flavor.
- Storage: Store your homemade Cinnamon Toast Crunch in an airtight container at room temperature for up to a week.
TIP: Alternatively, you can try this TikToker's method instead!

Image credit: iStock
Homemade Cheese Its (method #1)
Ingredients:
- 8 ounces (226 grams) sharp cheddar cheese, shredded (or a mixture of cheddar and parmesan for a stronger flavor)
- ¼ cup (57 grams) unsalted butter, cold and diced
- 1 teaspoon kosher salt
- 1 cup (125 grams) all-purpose flour
- 2-3 tablespoons ice water
Instructions:
- Prep the Cheese: Shred your cheddar cheese using a grater or food processor.
- Work the Butter: In a large bowl, combine the shredded cheese, cold diced butter, and salt. Using a pastry cutter, your fingers, or a food processor, work the butter into the cheese mixture until it resembles coarse crumbs.
- Adding the Flour: Gradually add the all-purpose flour to the cheese and butter mixture. Stir or pulse with short bursts (if using a food processor) until the flour is just incorporated and the dough starts to come together.
- Watery Adjustments: Add the ice water, one tablespoon at a time, until the dough just forms a ball. Be careful not to overmix, as this can make the crackers tough.
- Dough Chill Time: Wrap the dough ball in plastic wrap and refrigerate for at least 30 minutes (or up to an hour). Chilling helps firm up the dough and prevents the cheese from melting during baking.
- Preheat and Prep: Preheat your oven to 375°F (190°C) and line a baking sheet with parchment paper.
- Rolling it Out: On a lightly floured surface, roll out the chilled dough to a thin sheet, about ⅛ inch thickness. The dough can be a bit sticky, so use extra flour as needed to prevent sticking.
- Cutting the Crackers: Use a sharp knife or a fluted pastry cutter to cut the dough into desired squares. The classic Cheez-It size is around 1 inch squares.
- Optional Docking: You can use a fork to gently prick the tops of the dough squares a few times. This helps prevent them from puffing up too much while baking.
- Baking Time: Carefully transfer the cut-out dough squares to the prepared baking sheet. Bake for 10-12 minutes, or until the edges are golden brown and the crackers appear slightly crisp.
- Cooling Down: Once baked, remove the crackers from the oven and let them cool completely on the baking sheet before storing or enjoying. The crackers will crisp up further as they cool.
Tips:
- Experiment with Cheese: While cheddar cheese is classic, you can explore using other types of cheeses like parmesan, Gruyère, or even a blend for different flavor variations.
- Spice it Up: Add a pinch of cayenne pepper or smoked paprika to the dough for a bit of a kick.
- Storage: Store your homemade Cheez-Its in an airtight container at room temperature for up to a week.
Method #2
Ingredients:
- Ultra-thin sliced cheddar cheese (around 4-5 slices)
- Salt, to taste
Instructions:
- Preheat the Oven: Set your oven to the lowest possible setting, ideally around 275°F (135°C).
- Prepare the Cheese: Stack the ultra-thin cheese slices on top of each other.
- Cutting the "Crackers": Using a sharp knife or a cookie cutter (if you have one), cut the stacked cheese slices into desired shapes. Squares are classic Cheez-It shapes, but feel free to get creative with triangles or small rectangles.
- Optional Hole: You can use a straw or toothpick to poke a small hole in the center of each cheese square for a classic Cheez-It look. This also helps prevent them from puffing up too much while baking.
- Salt Sprinkle: Sprinkle a light layer of salt over the top of the cheese squares.
- Baking Time: Carefully arrange the cheese squares on a baking sheet lined with parchment paper. Here's the key: Bake the cheese squares for an extended time at the low oven temperature, around 25-30 minutes. This slow baking helps dry out the cheese without burning it.
- Checking for Crispness: Keep an eye on the cheese squares throughout baking. They are done when they appear dry and crisp around the edges, but not browned. Be careful not to overcook them, as they can become brittle and burn easily at low temperatures.
- Cooling Down: Once baked, remove the cheese squares from the oven and let them cool completely on the baking sheet before enjoying. They will crisp up further as they cool.
Tips:
- Cheese Selection: Using ultra-thin sliced cheese is crucial for even baking and achieving a crispy texture. Regular sliced cheese might be too thick and not crisp up properly.
- Temperature Control: Keep a close eye on the cheese at the low oven temperature to prevent burning.
- Flavor Boost: While this method uses just cheese and salt, you can explore adding a sprinkle of your favorite spices like paprika or cayenne pepper for a touch of extra flavor after baking.
- Storage: Store your homemade cheese crisps in an airtight container at room temperature for up to 3 days.
TIP: You can also try this TikToker's method.
Important Note: These are just a few ideas, and there are many variations you can explore. Remember, homemade options might not be as convenient as store-bought cereals or snacks, but they can be a healthier and more budget-friendly alternative.

Image credit: Pexels
Other Homemade Snacks TikTokers shared
- 3 Ingredient Goldfish - Grab this goldfish cracker cutter on Amazon to make these!
- 4 Ingredient Cocoa Puffs
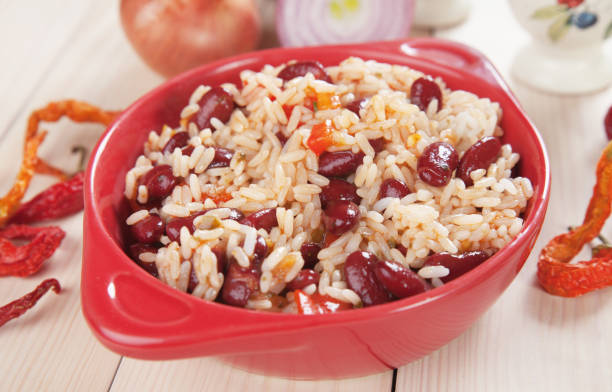
Image credit: iStock
Dinner Ideas Tastier (and Cheaper) Than Cereal
Cereal might seem like a quick and easy option, but these budget-friendly dinner ideas are just as convenient and way more satisfying for your taste buds and wallet. Here are a few recipes to inspire you, with estimated costs per serving (based on US national averages, prices may vary depending on your location):
Pantry Staples and Egg Wonders (Approx. $1.50 - $2.50 per serving):
Fried Rice: This classic is a great way to use up leftover rice. Saute chopped onion and garlic in a pan with some oil. Scramble some eggs and set aside. Add frozen vegetables (peas, carrots, corn) and cook until tender-crisp. Add cooked rice, soy sauce, and cooked, shredded chicken or tofu (optional) for extra protein. Heat through and stir in the scrambled eggs. Season with salt and pepper to taste.
Frittata: This crustless quiche is a lifesaver for using leftover ingredients. Preheat your oven to 375°F (190°C). In a bowl, whisk together 4-6 eggs with grated cheese (cheddar, parmesan, or a mix), chopped cooked vegetables (broccoli, peppers, onions), and dried herbs like oregano or thyme. Season with salt and pepper. Heat a skillet with a drizzle of oil over medium heat. Pour in the egg mixture and cook for a few minutes, then transfer the skillet to the oven and bake for 20-25 minutes, or until the center is set.
Egg Curry: Spice up your night with this Indian-inspired dish (Approx. $2.00 per serving). Boil 4 eggs and set aside. In a pot, heat some oil and add chopped onions and spices like cumin, turmeric, and curry powder (depending on your spice preference). Saute until fragrant, then add chopped tomatoes or a can of diced tomatoes. Simmer until the sauce thickens. Add cooked cubed potatoes (optional) and the boiled eggs. Pour in some coconut milk and simmer for a few minutes. Season with salt and pepper. Serve over cooked rice.
Hearty Pastas on a Budget (Approx. $1.00 - $2.00 per serving):
Pasta with Tomato Sauce: This versatile dish allows for endless customization. Saute chopped onion and garlic in a pan with olive oil. Add a can of crushed tomatoes, Italian seasoning, red pepper flakes (optional), and a pinch of sugar to balance the acidity. Simmer for 15 minutes. Cook your favorite pasta according to package directions. Toss with the tomato sauce, grated cheese (optional), and fresh chopped herbs like basil or parsley (optional) for a touch of brightness.
Mac and Cheese: A childhood favorite made grown-up affordable. In a pot, melt butter and whisk in flour. Cook for a minute, then slowly whisk in milk until a smooth sauce forms. Season with salt, pepper, and a pinch of nutmeg. Remove from heat and stir in grated cheese until melted. Cook your favorite pasta according to package directions. Drain and toss with the cheese sauce. For a crispy topping, mix breadcrumbs with melted butter and sprinkle over the top before baking for a few minutes under the broiler.
Pasta Primavera: This light and colorful dish is perfect for showcasing seasonal vegetables (Approx. $2.00 per serving). Cook your favorite pasta according to package directions. While the pasta cooks, blanch your favorite vegetables like broccoli florets, asparagus spears, and cherry tomatoes in boiling water for a few minutes. Heat olive oil in a pan and saute chopped garlic for a minute. Add the blanched vegetables and cook until slightly softened. Toss with cooked pasta, a squeeze of lemon juice, grated cheese (optional), and fresh herbs like basil or parsley (optional) for a vibrant flavor explosion.
Beans and Rice Delights for Budget Champions (Approx. $1.50 - $2.00 per serving):
Red Beans and Rice: This hearty and flavorful Cajun classic is a budget champion. In a pot, saute chopped onion, celery, and bell pepper in oil until softened. Add a can of kidney beans (rinsed and drained), diced tomatoes (canned or fresh), chicken broth, Cajun seasoning, and a bay leaf. Bring to a boil, then reduce heat and simmer for 30 minutes. Serve over cooked rice.
PRO TIP: I use my Instapot and use 1lb beans (can be red or llama), sausage of choice (Andoulli or Beef is my preference), onion, 2 cartons of beef or chicken stock in place of water, some garlic, and no salt Tony's seasoning. Set it to pressure cook for 3 hours and comes out great!
Black Bean Burgers: A vegetarian option packed with protein and fiber. Drain and rinse a can of black beans. Mash the beans with an egg, breadcrumbs, chopped onion, and spices like chili powder and cumin. Form the mixture into patties and pan-fry in oil until golden brown on both sides. Alternatively, you can bake the patties in a preheated oven at 400°F (200°C) for (approx. 20 minutes, or until cooked through). Serve on hamburger buns with your favorite toppings like lettuce, tomato, sliced onion, pickles, ketchup, and mustard.
Soup It Up for a Cozy Comfort (Approx. $1.50 - $2.00 per serving):
Potato Soup: This classic comfort food is perfect for a chilly night. In a pot, saute chopped onion and garlic in butter. Add diced potatoes and vegetable broth. Bring to a boil, then reduce heat and simmer until the potatoes are tender. Using an immersion blender or a food processor, puree a portion of the soup for a thicker consistency. Season with salt, pepper, and a splash of milk or cream for added richness. Top with crumbled cooked bacon or chopped fresh chives (optional).
Lentil Soup: This hearty and healthy soup is a protein and fiber powerhouse (Approx. $1.00 per serving). Rinse lentils and cook them in vegetable broth with chopped onion, carrots, celery, and spices like cumin and turmeric. Once the lentils are softened and the vegetables are tender, season with salt and pepper. For a creamier texture, you can puree a portion of the soup with an immersion blender or in a food processor. Serve hot with a sprinkle of chopped fresh parsley or cilantro.
Minestrone Soup: This Italian vegetable soup is packed with flavor and goodness. In a pot, heat olive oil and saute chopped onion, celery, and carrots. Add chopped tomatoes (canned or fresh), vegetable broth, and your favorite diced vegetables like zucchini, green beans, and cannellini beans (rinsed and drained). Season with Italian seasoning and a pinch of red pepper flakes (optional). Bring to a boil, then reduce heat and simmer until the vegetables are tender. Serve hot with grated parmesan cheese (optional) and a crusty bread roll for dipping.
Tomato Soup with Grilled Cheese: A simple yet satisfying duo. Homemade tomato soup is surprisingly easy and budget-friendly. Saute chopped onion and garlic in a pot with olive oil. Add crushed tomatoes, vegetable broth, Italian seasoning, and a pinch of sugar. Simmer for 15 minutes. Puree the soup with an immersion blender or in a food processor for a smoother consistency. Season with salt and pepper. To make the grilled cheese, simply butter two slices of bread and place them in a skillet over medium heat. Add a slice of cheese (cheddar, swiss, or a mix) in between the bread. Cook until golden brown and the cheese is melted. Serve the hot tomato soup with the melty grilled cheese for a delightful lunch or light dinner.
Remember, these are just starting points! Feel free to experiment with different ingredients and flavors to create your own budget-friendly masterpieces.

Image credit: Pexels
Starting a Conversation about the Kellogg's Boycott with Busy Friends and Family
The Kellogg's Boycott of 2024 can be a powerful movement, but it's understandable that busy schedules might make people hesitant to ditch the convenience of cereal. Here are some tips to initiate a conversation with friends and family who might be short on time:
Acknowledge the Time Crunch: Start by recognizing their busy lives. Say something like, "Hey, I know you're super busy, and cereal can be a quick option. But..."
Focus on Shared Values: If you know their concerns about the boycott, address them directly. For example, "I understand the convenience factor, but I was also reading about..." (mention a specific reason for the boycott).
Present Easy Alternatives: Don't just highlight the boycott, offer solutions! Share the link to the budget meal ideas article you found (https://www.fox9.com/news/cereal-for-dinner-kellogg-ceo-faces-backlash-for-suggesting-affordable-meal-option) and say, "These recipes actually look pretty quick and way tastier than cereal!"
Suggest Small Steps: Instead of going cold turkey, propose a trial period. "Maybe we could try skipping Kellogg's for a week and see how it goes? There are so many other breakfast options out there."
Emphasize the Benefits: Highlight the positive aspects of the boycott. "Think about it, we could be supporting smaller companies and maybe even discover new healthy breakfast favorites!"
Offer Support: Let them know you're there to help. "If you find it challenging during the week, I'd be happy to help brainstorm some quick breakfast ideas together."
Keep it Lighthearted: A sprinkle of humor can go a long way. "Who needs Tony the Tiger when you can have a breakfast fit for a king (or queen)?"
Remember:
- Be patient and respectful of their choices.
- Focus on the positive impact of the boycott, like supporting fair treatment of workers or healthier eating habits.
- Offer resources and support to make participation easier.
By starting a friendly conversation and offering solutions, you can encourage them to consider joining the boycott, even with a busy schedule. Remember, every little bit counts!
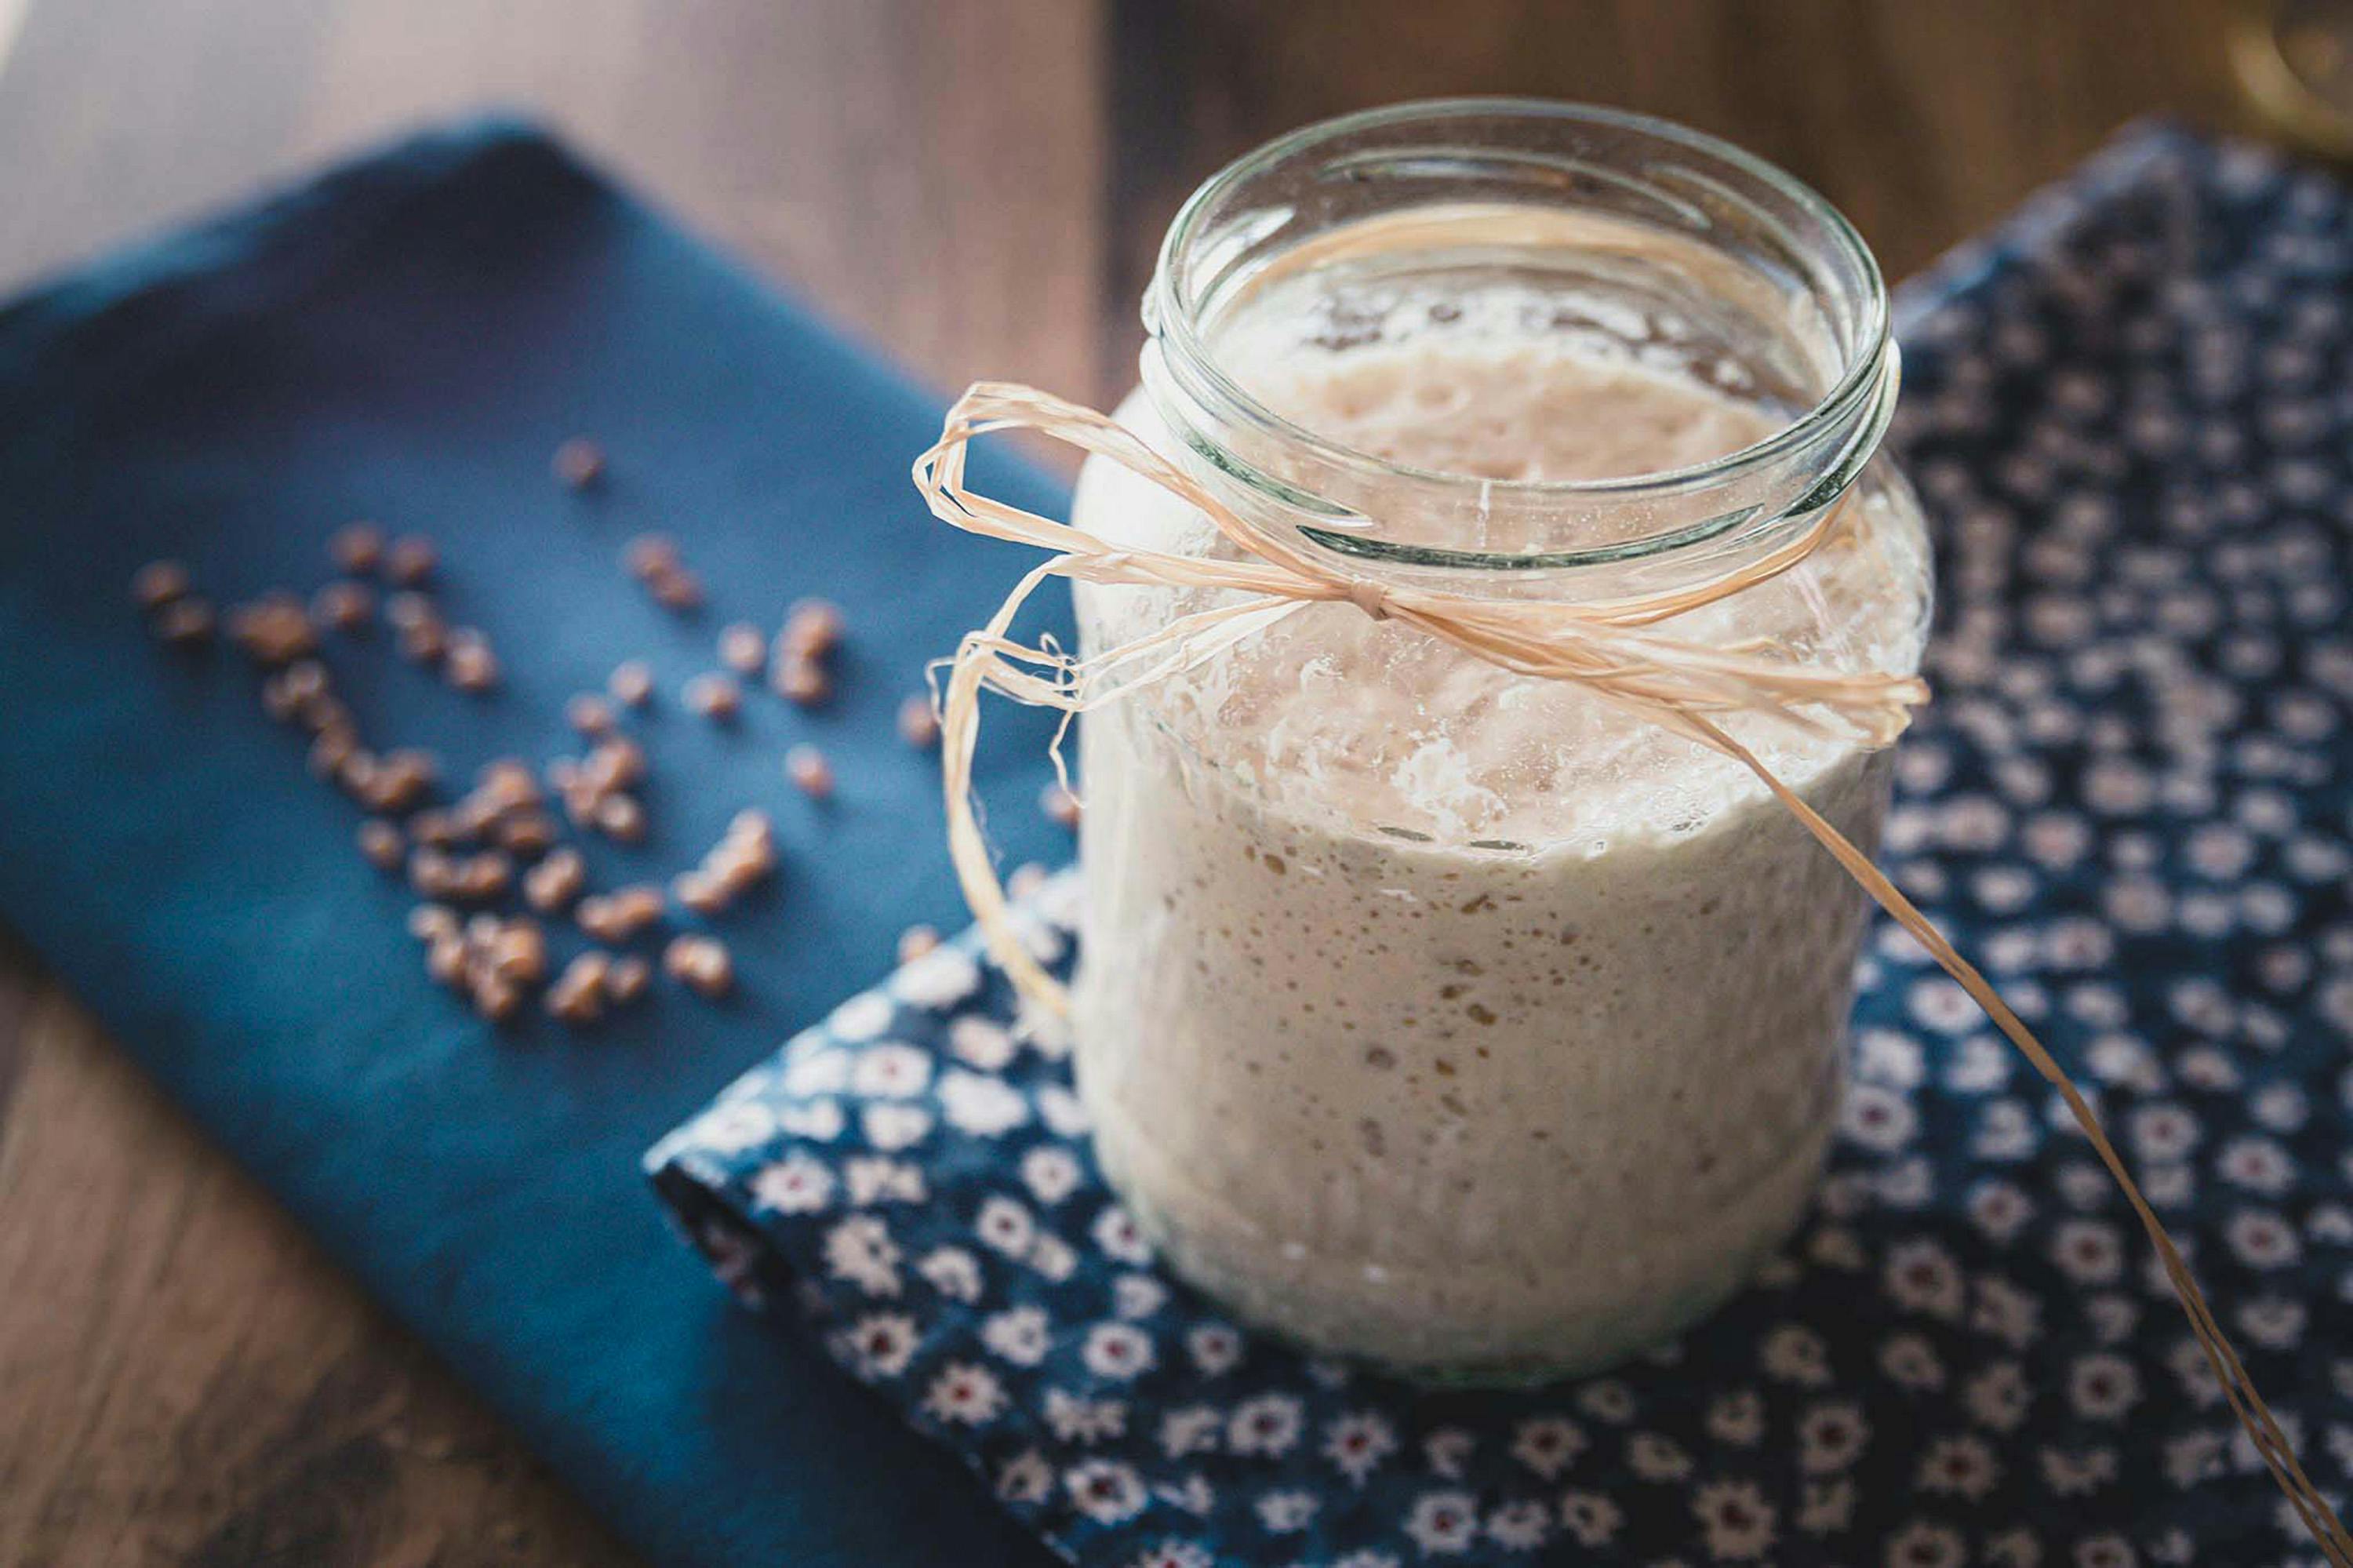
Image credit: Pexels
How To Start A Barter System From The Kellogg's Boycott
The Kellogg's boycott and a barter system are creative ways to express dissatisfaction and find alternatives. Here's how to kickstart a barter system inspired by the boycott:
1. Gauge Interest
Spread the Word: The first step is to gauge interest among friends, family, and neighbors who are participating in the Kellogg's boycott. Use social media, group chats, or good old-fashioned flyers to spread the word about wanting to start a barter system.
2. Define the Scope
Needs and Wants: Once you have a group interested, have a conversation about what people are willing to barter. This could include breakfast items (homemade granola, jams, fresh fruit), meal prep sessions, skills like cooking lessons or car maintenance, or even childcare.
3. Create a System
Matching Needs: There are two main approaches. You can create a platform (online group or spreadsheet) where people list their offerings and desired items. This allows browsing and individual bartering. Alternatively, you could organize regular "barter meetups" where everyone brings their offerings and trades directly.
4. Set Guidelines (Optional)
- Valuation: While bartering is inherently flexible, you might consider a loose valuation system for easier exchange. This could be based on time, effort, or quantity of the bartered item.
- Quality Control: It might be helpful to establish basic quality expectations for bartered items, especially for food-related items.
5. Promote Sustainability:
Focus on Homemade & Local: Encourage bartering homemade breakfast alternatives, using local ingredients when possible. This aligns with the boycott spirit and supports local businesses.
Remember:
- Start Small & Grow: Begin with a small group and see how it goes. As trust and successful trades increase, you can expand the network.
- Communication is Key: Clear communication about expectations and needs will ensure a smooth bartering experience.
- Have Fun! This is a chance to explore new options, support each other, and maybe even rediscover some hidden talents or culinary skills.
By combining the spirit of the Kellogg's boycott with a barter system, you can create a supportive community that thrives on resourcefulness and connection.
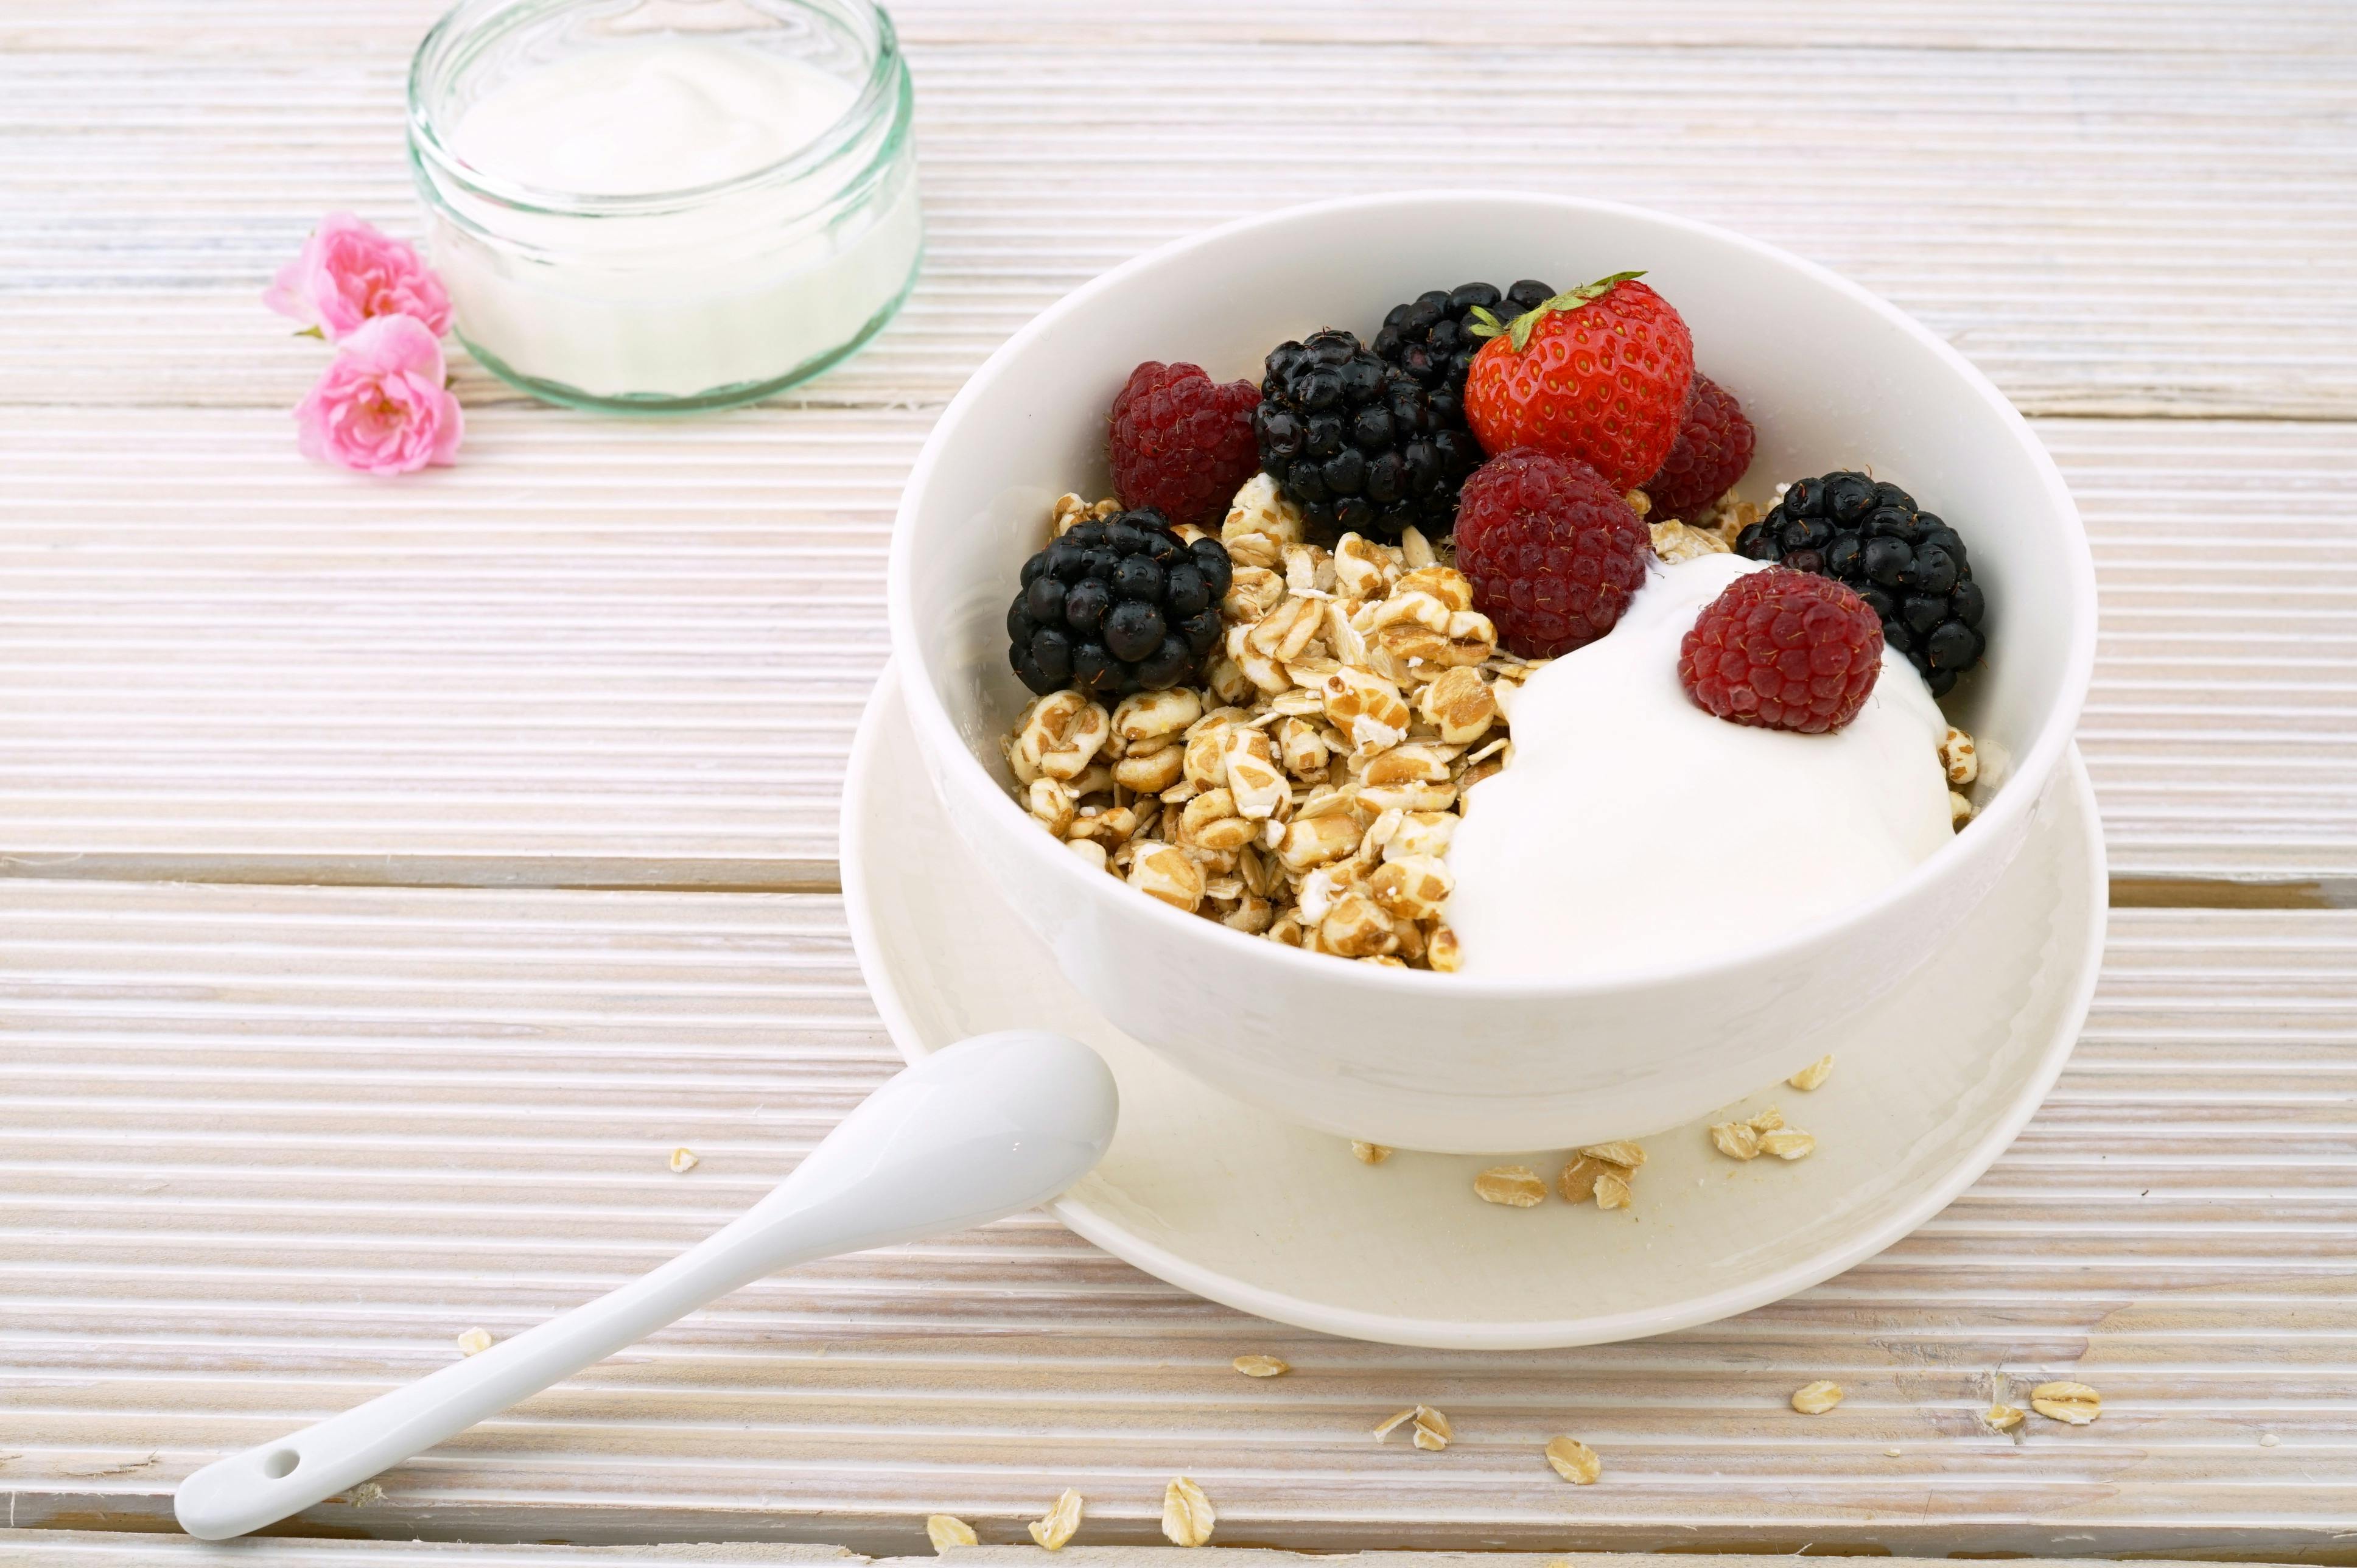
Image credit: Pexels
Conclusion
Joining the Kellogg's Boycott of 2024 doesn't have to mean sacrificing convenience or flavor at mealtimes. As you've seen, a little creativity can transform everyday pantry staples into delicious and satisfying meals that cost less than a box of cereal. From protein-packed bean burgers to cozy bowls of soup, these recipes prove that budget-friendly doesn't have to mean boring. So, stock up on affordable ingredients, unleash your inner chef, and discover a world of culinary delights beyond the cereal aisle. Not only will your wallet thank you, but your taste buds will be singing!
Kellogg's, Let's Talk (and Lower Prices!)
Listen up, Kellogg's! We, the loyal (and hungry) breakfast crew, have a few things on our minds. Here's the deal:
Cereal Costs a Fortune: We love our Frosted Flakes and Pop-Tarts, but lately, the price tag is leaving our wallets feeling a little frosted (and not in a good way). We're asking for a 25% price drop across the board. That way, everyone can enjoy a delicious Kellogg's breakfast without going broke.
Jobs Matter: We understand companies gotta make tough decisions sometimes, but laying off folks during a boycott? That's a recipe for disaster. We want a guarantee of NO layoffs during this boycott. In fact, maybe focus on keeping your awesome employees happy instead of raising prices!
Healthy Choices, Please!: We all want to start our day feeling good, not like we're ingesting a science experiment. We're asking for Kellogg's to ditch the chemical carcinogens and give us the same healthy ingredients you offer in the U.K. After all, shouldn't Americans deserve the same yummy and healthy breakfast options?
We're a reasonable bunch, Kellogg's. Let's work together to make breakfast great again (and affordable, and healthy!). We're all ears, so how about you listen up and make some changes?
PRO TIP: Learn about Saving Money at the Cheapest Grocery Stores In America!
Use Hashtags in social media
- #letthemeatcereal
- #boycottkelloggs
- #boycottkelloggs2024
- #letthemeatcake

Print Flyers
If you made a flyer you would like added, please email me with a link to your flyer that can be shared and I will include it on our list!
Psst... Check out the latest food samples currently available while you are here!
Have resources to add to this article (links, information, etc)? Please send me an email!
|
If you like Amazon deals & coupon codes join my Telegram Channel (It's FREE!)! Sign up here!
═════════════════════════════════
PROMOTE YOUR BRAND WITH US!
═════════════════════════════════
Want to showcase your product to the Closet of Free Samples audience? Then check out my available advertising options and email me to discuss!
|