
 Here you will find all the best coupon advice, tips and how to make the most of all your coupons!
 Are you looking for ways to stretch your dollar?


Being a prepper on a budget can seem daunting, but it's absolutely possible! The core of preparedness is self-reliance and resourcefulness, not about having the fanciest gear or the biggest stockpile. With a little planning and creativity, you can build a solid foundation for weathering unexpected situations without breaking the bank. Prepping doesn't have to drain your wallet. In this comprehensive guide, we'll explore creative and budget-friendly ways on how to be a prepper on a budget. From essential supplies to strategic planning, we've got you covered. Let's embark on the journey of preparedness without compromising your financial stability.
Jump Ahead
- Understanding the Basics of Prepping
- Budget-Friendly Gear Selection
- DIY Preparedness Projects on a Budget
- DIY Solar oven
- DIY First-aid
- Building a Nourishing Stockpile
- Your Guide to a Thriving Home Garden
- Meal Planning for Preppers
- Building Your Prepper Budget
- Thrifty Resource Management for Preppers
- The Power of Community Collaboration in Prepping
- Frequently Asked Questions
- Conclusion
PRO TIP: Check out these survival products on sale while you are here!
 Image credit: Freepik
How to be a Prepper on a Budget: Planning Essentials
Understanding the Basics of Prepping: Your Foundation for Self-Reliance
Taking the first steps towards self-reliance through prepping can feel overwhelming, but like building anything worthwhile, it's crucial to start with a strong foundation. Here's a breakdown of the key "basics" you need to understand before diving deeper:
Mastering the Rule of 3s: This simple framework prioritizes your needs in any survival situation:
- 3 Minutes without Air: Secure breathable space – whether it's escaping a fire or finding shelter after a storm.
- 3 Hours without Shelter: Protect yourself from harsh conditions. Learn basic fire-building and insulation techniques.
- 3 Days without Water: Prioritize access to clean drinking water. Explore purification methods, storage solutions, and alternative sources.
- 3 Weeks without Food: While important, focus on securing the above essentials first. Stock up on non-perishables and learn long-term food preservation techniques.
Gearing Up for the Essentials: Every prepper needs a grasp of these core resources:
- Water: Learn water purification methods like filtration, boiling, or using tablets. Invest in storage containers and explore alternative sources like rainwater harvesting.
- Food: Stockpile non-perishables like canned goods, rice, pasta, and beans. Consider canning, drying, or even starting a garden for long-term sustenance.
- Shelter: Understand how to secure existing structures or build basic shelters depending on your situation. Learn fire-building and insulation techniques.
- First Aid: Be prepared for minor injuries and illnesses. Equip yourself with a basic first-aid kit and learn CPR and wound care techniques.
Planning for the Unforeseen: Don't be caught off guard! Develop a comprehensive plan for various emergencies that might occur in your area:
- Natural Disasters: Research evacuation routes, emergency shelters, and communication strategies for floods, earthquakes, or tornadoes.
- Power Outages: Learn how to stay warm, informed, and safe without electricity. Invest in flashlights, alternative cooking methods, and battery-powered radios.
PRO TIP: Check out my winter power outage survival guide! - Medical Emergencies: Have a plan for accessing medical care during disruptions. Create an emergency contact list and ensure everyone in your family knows what to do.
Resource Management: Making the Most of What You Have:
- Inventory and Audit: Take stock of existing supplies. You might already have hidden gems you can rely on.
- Shop Smart: Look for sales, bulk deals, and ways to stretch your budget on essential items.
- DIY and Learn: Knowledge is power! Learn basic skills like repair, gardening, water purification, and improvisation to utilize limited resources effectively.
Building a Network of Support: You're not alone! Connect with other preppers in your area for knowledge, resources, and support:
- Join local prepping groups or online forums: Learn from others and share your experiences.
- Barter and Trade: Exchange skills, services, or surplus items with other preppers.
- Build a Community Support Network: Look out for each other and create a sense of resilience in your community.
Remember, prepping is a journey, not a destination. Start small, be resourceful, and keep learning. By mastering these basics, you'll lay a strong foundation for self-reliance and navigate the challenges of the future with confidence. Now go forth, learn, adapt, and build your preparedness journey one step at a time!
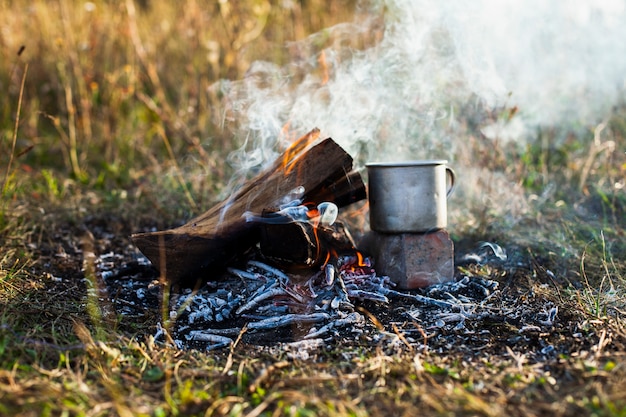
Image credit: Freepik
Budget-Friendly Gear Selection: Equipping Yourself Without Emptying Your Wallet
Prepping on a budget doesn't mean skimping on quality or safety. It's about smart choices, resourcefulness, and knowing where to look for value. This guide will equip you with strategies to assemble an effective prepping gear kit without burning a hole in your pocket.
Prioritize and Plan:
- Focus on the essentials: Before you start browsing, identify the critical gear you need based on your local threats and priorities. Water purification, basic shelter tools, and a first-aid kit should be at the top of your list.
- Set a budget: Allocate a realistic amount for prepping gear and stick to it. This will help you prioritize your purchases and avoid impulse buys.
PRO TIP: Use my income and expense tracking excel spreadsheet to keep track of your finances!
Seek Out Affordable Alternatives:
- Second-hand stores and online marketplaces: Thrift stores, garage sales, and online platforms like Facebook Marketplace can be treasure troves for gently used camping, hiking, and survival gear at a fraction of the retail price.
PRO TIP: Don't forget to follow Closet of Free Samples on Facebook so you don't miss out on any deals! - Military surplus stores: These stores often stock durable, reliable equipment at discounted prices. Check for backpacks, sleeping bags, and tools that may have seen some action but still have plenty of life left.
- DIY and multi-purpose tools: Investing in a good multi-tool or learning basic repair skills can replace the need for multiple specialized tools, saving you money in the long run.
PRO TIP: Consider downloading these free apps to help you find free stuff being given away in your community!
Think Outside the Box:
- Repurpose and upcycle: Get creative! Old containers can become storage units, blankets can be repurposed for insulation, and even cardboard boxes can find new life as makeshift shelters.
- Borrow or barter: Consider borrowing gear from friends and family for occasional use, or barter skills and services for needed items within your prepping community.
- Focus on versatility: Choose gear that can serve multiple purposes. A water bottle with a built-in filter, a camp stove that doubles as a fire starter, or a multi-functional bandana can stretch your budget further.
Quality over Quantity:
- Invest in core items: While affordability is important, prioritize quality for essential items like first-aid kits, water purification systems, and emergency shelters. These are not areas where you want to cut corners.
- Look for durability: Choose gear made from robust materials that can withstand wear and tear. A well-made, used backpack might be a better investment than a flimsy new one.
- Research and compare: Read reviews, compare prices, and don't be afraid to negotiate. Finding the best value for your money takes a little research, but it's worth the effort.
Remember, the best prepping gear is the gear you have and know how to use. Start small, prioritize your needs, and be resourceful. With a little planning and creativity, you can build a solid and affordable foundation for your self-reliance journey.
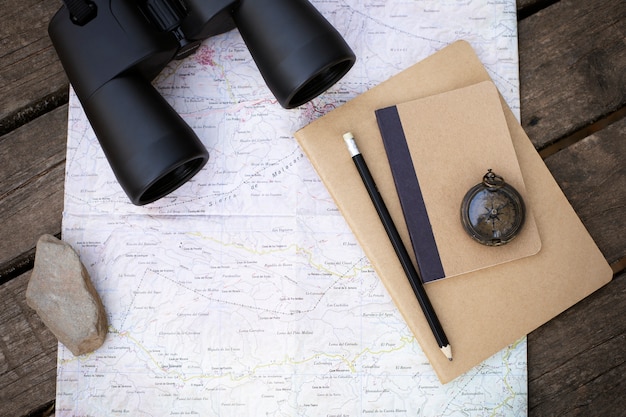 Image credit: Freepik
DIY Preparedness Projects on a Budget
Prepping doesn't require a hefty bank account and fancy gadgets. The spirit of self-reliance thrives on resourcefulness and ingenuity, and what better way to embody that spirit than through DIY projects? Here are some fun and affordable ventures to elevate your preparedness kit and unleash your inner inventor:
Water Wisdom:
- Gravity-powered water filter: Upcycle a plastic bucket, string, and ceramic filter to create a portable water purification system. No electricity needed!
- Charcoal filtration: Activated charcoal, sand, and gravel layered in a clay pot can provide emergency water filtration on the go.
- Rainwater harvesting: Capture the life-giving liquid with strategically placed barrels and a simple gutter system. Every drop counts in a drought.
Light It Up:
- Mason jar lanterns: Fill jars with oil and wicks for beautiful and functional emergency lighting. Experiment with different oils and decorations for a personalized touch.
- Headlamp conversion kit: Transform an old bike light into a hands-free headlamp with some duct tape and creativity. Save those batteries for essential devices.
- Candle wick extensions: Make candles last longer by attaching lengths of string or twine and soaking them in oil. Bonus points for using recycled containers as candle holders.
Shelter Smarts:
- Cardboard box emergency shelter: This might sound flimsy, but with strategic layering and insulation (think blankets, newspapers, leaves), a cardboard box can provide surprising warmth and protection.
- Tarp tent: Learn basic knot tying and pitching techniques to turn a simple tarp into a versatile emergency shelter. Lightweight and packable, it's a must-have in your kit.
- Emergency sleeping bag: Repurpose old blankets or sleeping bags into a layered, multi-person emergency shelter. Perfect for car camping trips or unexpected situations.
Try These:
PRO TIP: Check out this Important Survival Gear to Get NOW for Any Emergency!

Image credit: Freepik
Beyond the Basics:
DIY Solar oven:
Craft a mini solar oven from cardboard, aluminum foil, and plastic wrap to cook food safely and efficiently using the sun's power.
Here's what you'll need:
- Cardboard box: Medium-sized pizza boxes work well, but any sturdy cardboard box will do.
- Aluminum foil: Enough to cover the interior of the box and create a reflective flap.
- Plastic wrap: A large sheet to create a transparent window.
- Utility knife or scissors: For cutting the cardboard and plastic wrap.
- Ruler or straightedge: For precise measurements.
- Duct tape or glue: To secure the foil and plastic wrap.
- Black construction paper (optional): For additional heat absorption.
- Cooking tray or dish (heat-resistant): To hold your food inside the oven.
Instructions:
- Prepare the box: Remove any flaps or inserts from the box. Cut a rectangular flap on the lid, leaving about a 1-inch border on three sides.
- Reflective lining: Line the inside of the box and the underside of the flap with aluminum foil, securing it with tape or glue. Ensure smooth, reflective surfaces.
- Optional layer: If using, cut black construction paper to fit the bottom of the box and adhere it with tape or glue for additional heat absorption.
- Create the window: Stretch a sheet of plastic wrap over the rectangular flap opening, securing it tightly with tape or glue to create a transparent window.
- Propping it up: Adjust the angle of the flap so it reflects sunlight directly onto the inside of the box. You can use sticks, books, or anything sturdy to prop it up at the optimal angle.
Tips for Using your Solar Oven:
- Focus the sunlight: Position the oven in direct sunlight throughout the day to maximize cooking efficiency. Adjust the angle of the flap as the sun moves.
- Preheat the oven: Let the oven sit in direct sunlight for 15-20 minutes before adding your food to trap heat effectively.
- Black-colored containers: Use dark-colored cooking trays or dishes for faster and more efficient heat absorption.
- Start small and simple: Begin with thin, quick-cooking foods like sandwiches, wraps, or vegetables. Experiment with different recipes and cooking times as you gain experience.
- Safety first: Never leave the oven unattended while in use. Be mindful of hot surfaces and avoid touching the metal parts when exposed to direct sunlight.

Image credit: Freepik
First-aid kit essentials:
Learning to make herbal poultices offers a variety of benefits that extend beyond simply having a cool herbal remedy at hand. Here are some key advantages:
Health and Healing:
- Natural pain relief: Poultices can be used to alleviate pain from muscle soreness, sprains, insect bites, and even minor burns. Some herbs like arnica and calendula have specific anti-inflammatory properties that can be particularly effective.
- Reduced swelling and inflammation: Certain herbs like comfrey and witch hazel have astringent properties that can help reduce swelling and inflammation from injuries or infections.
- Improved wound healing: Certain herbs like chamomile and lavender have antiseptic and antimicrobial properties that can promote wound healing and prevent infection.
- Soothes and relieves skin conditions: Herbal poultices can be helpful for soothing itchy skin, calming rashes, and reducing the appearance of blemishes.
Self-Sufficiency and Knowledge:
- Increased independence: Knowing how to make your own herbal remedies can give you a sense of self-reliance and independence, especially in situations where access to conventional healthcare might be limited.
- Deepened connection to nature: Learning about medicinal plants and their properties fosters a deeper understanding and appreciation for the natural world and its ability to provide for our needs.
- Personal empowerment: The ability to create your own healing remedies can be empowering and instill a sense of confidence in your ability to care for yourself and others.
Financial Benefits:
- Cost-effective alternative: Herbal poultices are often a more affordable option compared to purchasing over-the-counter medications or seeking professional treatment for minor ailments.
- Reduce reliance on pharmaceuticals: For some minor complaints, herbal poultices can offer a natural and potentially less harmful alternative to relying on medication with potential side effects.
Learn to make herbal poultices, wound dressings from natural materials, and DIY pain relievers using common household ingredients.
Herbal Poultices: These external applications draw out infection and promote healing.
- Chamomile: Soothes burns, reduces inflammation, and promotes healing. Soak chamomile flowers in hot water for 10 minutes, strain, and apply as a compress to minor burns or wounds.
- Turmeric: Powerful anti-inflammatory and antiseptic properties. Make a paste with turmeric powder and a little water, apply to sprains, bruises, or insect bites for relief.
- Arnica: Traditionally used for pain relief and swelling. Steep arnica flowers in olive oil for 2 weeks, strain, and apply topically to aches and pains.
Wound Dressings: Natural materials can offer sterile and breathable coverage for minor cuts and scrapes.
- Plantain leaves: Rich in allantoin, which promotes healing and reduces inflammation. Crush fresh plantain leaves into a paste and apply directly to wounds.
- Honey: Natural antibacterial properties and promotes wound healing. Apply a thin layer of raw honey to clean cuts and scrapes.
- Cabbage leaves: Excellent for drawing out infection and reducing swelling. Wrap a clean cabbage leaf around the wound and secure with a bandage.
DIY Pain Relievers: These natural options can offer relief from headaches, muscle aches, and other common ailments.
- Ginger tea: Anti-inflammatory properties help with headaches and muscle aches. Steep grated ginger in hot water for 10 minutes and enjoy the soothing warmth.
- Cayenne pepper: Capsaicin stimulates circulation and can provide temporary pain relief. Mix a small amount of cayenne pepper with honey or yogurt and consume sparingly.
- Apple cider vinegar: Soothes muscle cramps and headaches. Dilute apple cider vinegar with water (1:2 ratio) and drink or apply topically to sore muscles.
Remember:
- Consult a healthcare professional: While these natural remedies can be helpful, never substitute them for professional medical advice, especially for serious injuries or chronic conditions.
- Research and practice: Always research individual herbs and ingredients before using them, and start with small amounts to check for potential allergies or adverse reactions.
- Hygiene and sanitation: Cleanliness is crucial for any first-aid treatment. Ensure proper hygiene while preparing and applying herbal remedies.
Building your own natural first-aid kit empowers you to take control of your health and well-being, even with limited resources. Experiment safely, find what works for you, and remember, knowledge is your best tool in any situation.
Of course, it's important to remember that herbal poultices are not a replacement for professional medical care for serious injuries or illnesses. However, for minor ailments and general well-being, learning to make these natural remedies can provide a wealth of benefits for both your health and your overall well-being.
So, if you're looking for a natural, cost-effective way to take charge of your health and connect with the healing power of plants, consider venturing into the world of herbal poultices. You might be surprised at the benefits it can bring!
 Image credit: Freepik
Signal flares:
With a little chemistry and creativity, you can create your own emergency flares using saltpeter, sugar, and other readily available materials. However, I must advise against it unless you honestly know what you are doing due to the inherent safety risks involved. Homemade flares, especially those involving chemicals, can be unpredictable and potentially dangerous.
Here's why it's important to avoid DIY flares:
- Explosions and fire hazards: The ingredients and reactions involved in making flares can lead to unexpected explosions or uncontrolled fire, posing a serious risk to yourself and others.
- Chemical burns and inhalation hazards: Handling and mixing chemicals used in flares can cause skin and eye burns, as well as respiratory problems if fumes are inhaled.
- Improper effectiveness: DIY flares may not burn brightly enough or last long enough to be effective signaling tools in an emergency.
- Legality and regulations: Depending on your location, manufacturing or possessing certain flare ingredients may be illegal or require specific permits.
Instead of attempting to make your own flares, I recommend considering these safer alternatives:
- Invest in commercially manufactured flares: These are designed and tested for safety and effectiveness, ensuring reliable performance in an emergency.
- Learn and practice alternative signaling methods: Signaling mirrors, whistles, and even brightly colored flags can be effective ways to attract attention in an emergency, without the risks associated with flares.
- Attend survival skills training: Consider taking courses or workshops on wilderness survival skills, which may include safe and responsible use of commercially available flares.
Remember, the key to successful DIY preparedness projects is research, ingenuity, and safety. Don't be afraid to experiment and adapt existing ideas to your own needs and resources. The satisfaction of building your own preparedness solutions is priceless, and the skills you learn along the way are invaluable assets in any situation. So, roll up your sleeves, fire up your imagination, and let the DIY prepping adventures begin!
 Image credit: Freepik
Building a Budget-Friendly Food Stockpile
Mastering the Art of Smart Grocery Shopping for Prepping: Building a Nourishing Stockpile
Prepping starts in the aisles, and smart grocery shopping becomes your superpower. It's about building a well-rounded, long-lasting stockpile without breaking the bank.
PRO TIP: Read Smart Shopping: Your Ultimate Guide to Saving Big!
Here's your guide to becoming a savvy prepper in the supermarket:
Prioritize Your Essentials:
- Focus on non-perishables: Canned goods, dried beans, rice, pasta, and oats are your allies. Opt for whole grains and nutrient-dense options whenever possible.
- Protein power: Stock up on canned meat, fish, legumes, and nuts for sustained energy and essential amino acids.
- Don't forget fats: Healthy fats like olive oil, avocados, and nuts provide flavor, satiety, and essential nutrients.
- Vital vitamins and minerals: Canned vegetables, dried fruits, and vitamin-enriched options like brown rice and quinoa ensure your stockpile isn't just calorie-dense, but nutrient-rich.
Master the Art of the Deal:
- Price matching and coupons: Use store apps, loyalty programs, and online resources to find the best deals and discounts. Every penny saved adds up in the long run.
- Buy in bulk strategically: Consider buying staples like rice and beans in bulk when prices are low, but be mindful of storage space and expiration dates.
- Don't underestimate store brands: Generic varieties often offer the same quality as name brands at a fraction of the price.
- Plan your meals and shop with a list: Avoid impulse buys and stick to your list to prevent food waste and maximize your budget.
PRO TIP: Learn How to Feed a Family of 4 on Only $5 Per Day!
Think Beyond the Supermarket:
- Explore local farmers markets and growers' cooperatives: You might find seasonal produce, bulk grains, and other goodies at competitive prices, while supporting local agriculture.
- Learn to preserve: Canning, drying, and fermenting your own food extends its shelf life and allows you to take advantage of seasonal abundance.
- Barter and trade: Connect with other preppers in your community and consider bartering skills, services, or surplus items for needed supplies.
Building a Balanced Stockpile:
- Variety is key: Don't just stockpile pasta! Aim for a diverse mixture of food groups and flavors to prevent boredom and maintain nutritional balance.
- Consider your dietary needs: If you have allergies or dietary restrictions, ensure your stockpile caters to your specific needs.
- Think beyond survival: While prepping focuses on long-term sustenance, don't forget occasional treats and comfort foods. A bit of indulgence goes a long way in maintaining morale.
- Rotate your stockpile: Regularly check expiration dates and use older items first to prevent food waste.
Remember, smart grocery shopping for prepping is an ongoing process. Research, plan, compare prices, and adapt your strategies as needed. By utilizing these tips and building a well-rounded food stockpile, you'll be prepared to nourish yourself and your loved ones, no matter what challenges arise. So, grab your reusable bags, sharpen your budgeting skills, and get ready to conquer the aisles like a prepper pro!
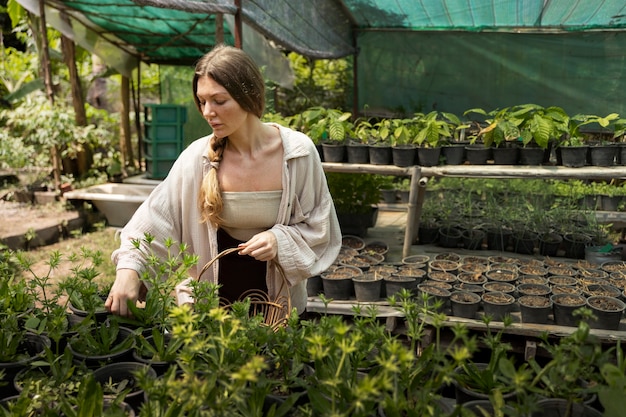 Image credit: Freepik
Cultivating Self-Sufficiency: Your Guide to a Thriving Home Garden
Gardening for self-sufficiency offers a rewarding path towards reduced expenses, fresher food, and a deeper connection to the land. Here's your guide to turning your humble patch into a bountiful oasis of nourishment:
Planning for Plenty:
- Assess your space: Start by analyzing your available sunlight, soil quality, and water access. This will determine what you can successfully grow.
PRO TIP: Learn How to Find Cheap Land! - Choose your champions: Prioritize vegetables and herbs you and your family enjoy eating regularly. Leafy greens, beans, tomatoes, peppers, and herbs are excellent low-maintenance options.
- Embrace succession planting: Plan your plantings strategically to extend your harvest throughout the year. Sow quick-growing crops like radishes and spinach in between slower-maturing veggies.
Planting for Success:
- Start from seeds or seedlings: Seeds are budget-friendly but take longer to mature. Seedlings offer a head start for impatient gardeners.
- Compost is king: Create your own rich, nutrient-filled compost to improve soil quality and reduce dependence on chemical fertilizers.
- Watering wisdom: Water deeply and less frequently for stronger root systems. Consider water-saving techniques like mulching and rainwater harvesting.
Beyond the Basics:
- Container gardening: Maximize limited space with pots and raised beds. Herbs, peppers, and even cherry tomatoes thrive in containers.
- Vertical gardening: Take advantage of vertical space with trellis systems and climbing plants like beans and peas.
- Fruits for the future: Consider planting fruit trees and bushes for a long-term source of vitamins and sweetness. Start with low-maintenance options like berries and dwarf fruit trees.
Preserving your Bounty:
- Canning and pickling: Extend the shelf life of your harvest by canning or pickling surplus vegetables and fruits.
- Drying and dehydrating: Herbs, peppers, and even mushrooms can be dried for later use in soups, stews, and teas.
- Fermentation: Turn your cabbage into sauerkraut or try your hand at fermenting other vegetables for a healthy probiotic boost.
Remember:
- Start small and expand gradually: Don't overwhelm yourself! Begin with a manageable plot and add more as you gain experience and confidence.
- Embrace experimentation: Learning by doing is part of the fun. Try different varieties, planting techniques, and recipes to discover what works best for you and your garden.
- Seek support and knowledge: Connect with other gardeners, online communities, and local resources for advice, inspiration, and practical tips.
Gardening for self-sufficiency is a journey, not a destination. With dedication, patience, and a sprinkle of knowledge, you can transform your patch of earth into a source of nourishment, self-reliance, and endless satisfaction. So, grab your gardening gloves, get your hands dirty, and watch your little piece of paradise bloom!
 Image credit: Freepik
Conquering the Kitchen on a Budget: Meal Planning for Preppers
Prepping doesn't have to equate to bland, expensive meals. Embrace budget-friendly planning that nourishes your body and wallet, even in challenging times.
PRO TIP: Learn about Affordable Meals You Can Make from Dollar Tree Ingredients!
Here's your guide to crafting delicious, economical, and long-lasting meal plans for any emergency:
Embrace the Power of Staples:
- Stockpile smart: Focus on long-lasting, versatile ingredients like rice, beans, lentils, pasta, canned goods, and oats. These are inexpensive, nutrient-dense, and can be transformed into countless dishes.
- Think whole grains: Opt for brown rice, quinoa, and whole-wheat pasta for superior fiber and sustained energy.
- Don't underestimate beans: Lentils, black beans, and chickpeas are budget-friendly protein powerhouses, adding heartiness and essential nutrients to any meal.
Get Creative with Ingredients:
- Master repurposing: Leftovers become tomorrow's lunch or transformed into new dishes. Cooked rice can be added to soups, stir-fries, or stuffed peppers.
- One-pot wonders: Embrace soups, stews, and casseroles that utilize multiple ingredients in one pot, minimizing cleaning and maximizing flavor.
- Seasonal saviors: When possible, incorporate fresh, local produce that's often more affordable and nutritious during peak season.
Planning for Efficiency:
- Weekly meal mapping: Plan your meals for the week and create a shopping list based on those needs. This reduces impulse buys and optimizes your budget.
- Bulk cooking and portioning: Cook large batches of staples like rice, beans, and pasta, then freeze portions for quick and easy meals later.
- Minimize food waste: Learn proper storage techniques and use older ingredients first to prevent unnecessary waste and maximize your stockpile's lifespan.
Spice Up Your Life:
- Flavorful friends: Herbs and spices aren't just delicious, they can stretch the flavor profile of simple ingredients. Invest in basic spices like garlic powder, cumin, paprika, and chili flakes for endless culinary possibilities.
- Homemade delights: Experiment with making your own broth, sauces, and salad dressings to add flavor and customize your meals without breaking the bank.
Remember:
- Nutrition matters: Choose nutrient-rich, whole foods over processed options. Your body needs proper fuel to function during challenging times.
- Get creative and have fun! Experiment with different flavors, textures, and cuisines to avoid mealtime monotony. Prepping for emergencies shouldn't mean sacrificing on taste or enjoyment.
- Community is key: Share recipes, cooking tips, and surplus with your local community. Collaboration strengthens everyone's preparedness and fosters a sense of support.
Budget-friendly meal planning for prepping is about resourcefulness, adaptability, and embracing the joy of cooking. By following these tips and unleashing your culinary creativity, you can nourish yourself and your loved ones, proving that delicious, nutritious meals are possible even in challenging situations.
 Image credit: Freepik
Financial Preparedness: Making Every Penny Count
Building Your Prepper Budget: A Roadmap to Financial Preparedness
Prepping doesn't have to drain your bank account. By crafting a smart and flexible budget, you can prioritize essential items and ensure you're prepared without sacrificing financial stability. Here's how to navigate the numbers and build a budget that empowers your preparedness journey:
Know Your Numbers:
- Track your current expenses: Before you build, you need a foundation. Analyze your income and expenses for a month to understand your spending patterns and identify potential areas for adjustments.
- Set realistic goals: Determine your desired level of preparedness. Do you want a basic emergency kit, a long-term stockpile, or something in between? Defining your goals helps guide your budget allocation.
Prioritize Necessities:
- Focus on essentials first: Allocate funds for critical items like food, water, shelter, sanitation, and first-aid. These are your non-negotiables in any emergency.
- Choose quality over quantity: Invest in durable, long-lasting items, even if it means spending slightly more upfront. A good pair of boots or a reliable water filter will serve you better in the long run than cheaper alternatives.
Embrace Cost-Effectiveness:
- Seek budget-friendly alternatives: Explore DIY projects, second-hand stores, and online deals. Research cheaper options for essential items like clothing or tools without compromising quality or safety.
- Plan and prioritize purchases: Avoid impulse buys and stick to your list. Planning meals, buying in bulk when possible, and taking advantage of discounts can significantly reduce your expenses.
- Multitasking magic: Choose versatile items that can serve multiple purposes. A camping stove can double for cooking indoors, a multi-tool replaces several separate tools, and a sturdy backpack can be used for everyday activities too.
Budgeting with Flexibility:
- Build in contingency funds: Unexpected expenses happen. Allocate a portion of your budget for unforeseen circumstances to avoid derailing your preparedness plan.
- Review and adjust: Your budget is not static. Regularly review your progress, adjust allocations as needed, and adapt to changing priorities or circumstances.
- Community connections: Consider barter and trade within your prepping community. Sharing skills, services, or surplus items can help everyone stretch their budget further.
Remember:
- Prepping is a marathon, not a sprint: Don't try to do everything at once. Start with the basics, build gradually, and celebrate each step of your progress.
- Financial security is key: Prioritize your overall financial stability. Maintaining your regular expenses while prepping ensures you're not compromising your long-term financial well-being.
- Knowledge is power: Educate yourself about budgeting, prepping strategies, and cost-saving techniques. The more you know, the more effectively you can manage your resources.
By creating a well-planned and flexible prepping budget, you empower yourself to take control of your preparedness journey. Remember, with smart planning, resourcefulness, and a little bit of creativity, you can build a solid foundation for your future, without breaking the bank.
 Image credit: Freepik
Thrifty Resource Management for Preppers: Stretching Your Budget to the Max
Prepping doesn't require a bulging bank account. In fact, the heart of successful preparedness lies in resourcefulness, ingenuity, and embracing a thrifty mindset.
Here's how to make the most of what you have, minimize waste, and stretch your prepping budget to the limit:
Repurposing Powerhouse:
- Transform everyday containers: Glass jars become storage for spices, dried herbs, or small parts. Milk jugs morph into plant watering cans or emergency funnels. Think outside the box and give new life to old containers.
- Upcycle clothing and fabrics: Old clothes become cleaning rags, emergency blankets, or insulation padding. Turn scraps into DIY bandages or repair kits. Don't underestimate the power of textiles!
- Reimagine furniture and tools: A sturdy dresser can become a pantry or storage unit. Broken tools can be repaired or repurposed for different tasks. Get creative and breathe new life into forgotten items.
DIY and Multitasking Magic:
- Embrace repair skills: Learn basic mending, carpentry, and tool maintenance. Fixing what you have instead of buying new saves money and builds self-reliance.
- Master multi-purpose tools: Invest in tools that serve multiple functions. A sturdy pocket knife, a versatile multi-tool, or a camp stove that doubles as a fire starter can replace several individual items.
- Craft your own essentials: Make your own first-aid kit with natural remedies, learn to purify water with DIY filters, or whip up delicious meals from pantry staples. Self-sufficiency goes a long way!
Building Barter Networks:
- Community connections: Don't underestimate the power of bartering within your prepping community. Skills, services, and surplus items can be traded for needed supplies, creating a mutually beneficial network.
- Sharing knowledge: Organize workshops or skill-sharing sessions within your community. Teach basic repair skills, gardening techniques, or DIY preparedness projects, fostering self-reliance and strengthening collective preparedness.
The Zero-Waste Warrior:
- Composting magic: Turn food scraps and yard waste into nutrient-rich compost for your garden, reducing waste and enriching your soil naturally.
- Water-saving wisdom: Collect rainwater in barrels for watering plants, flushing toilets, or even handwashing in a pinch. Every drop saved adds up!
- Upcycling and repurposing: Before discarding anything, ask yourself if it can be repurposed or upcycled into something new. Think creatively and minimize waste at every step.
Remember:
- Thrifty living is a mindset: Approach prepping with a focus on resourcefulness and making the most of what you have. It's not about deprivation, but about conscious choices and maximizing your resources.
- Knowledge is power: Learn new skills, explore DIY projects, and research alternative solutions. The more you know, the more opportunities you'll discover for thrifty resource management.
- Embrace community: Share your skills, barter resources, and learn from others. A supportive community fosters collective preparedness and strengthens everyone's resilience.
By embracing a thrifty approach to prepping, you unlock a world of possibilities. You'll not only save money, but also cultivate self-reliance, resourcefulness, and a deeper connection to your community.
 Image credit: Freepik
How to be a Prepper on a Budget: Practical Tips
The Power of Community Collaboration in Prepping
Prepping doesn't have to be a solitary endeavor. By forging bonds with like-minded individuals, you can tap into the immense power of community collaboration, building a network of support and resilience that goes far beyond the sum of its parts. Here's how community collaboration elevates your preparedness to new heights:
Collective Purchasing Power:
- Bulk buying bonanza: Negotiate discounted rates on essential supplies by pooling resources with your community. Imagine the cost savings on water purification tablets, emergency food kits, or long-lasting staples when bought in bulk!
- Shared equipment and tools: Instead of everyone owning a generator, consider a community-owned one for shared use during emergencies. This reduces individual expenses and ensures vital equipment is readily available when needed.
- Barter and trade network: Within your community, barter skills, services, and surplus items for needed supplies. A carpenter can trade repairs for food, a skilled gardener can share their harvest, and bartering creates a self-sustaining ecosystem of preparedness.
Resource Sharing and Knowledge Transfer:
- Skill-sharing workshops: Organize workshops on essential prepping skills like first-aid, water purification, gardening, or DIY projects. By teaching and learning from each other, you collectively build a formidable knowledge base for navigating emergencies.
- Seed and plant exchange: Share seeds, seedlings, and gardening tips to establish and maintain community gardens. This fosters food security, promotes shared responsibility, and creates a sustainable source of fresh produce.
- Emergency communication network: Establish a reliable communication system for your community, using walkie-talkies, ham radios, or designated community hubs. Stay connected even when conventional forms of communication falter, ensuring everyone's safety and awareness during emergencies.
Strengthening Resilience and Morale:
- Emotional support and solidarity: Prepping can be daunting. A supportive community provides a network of encouragement, shared experiences, and emotional support, making the journey less isolating and more manageable.
- Collective problem-solving: When challenges arise, your community becomes a brain trust of diverse perspectives and skillsets. Brainstorm solutions, share resources, and face uncertainties together, enhancing your collective problem-solving capabilities.
- Building a culture of preparedness: A collaborative prepping community normalizes and prioritizes readiness. This shared dedication inspires individual action, strengthens everyone's preparedness, and fosters a stronger, more resilient community as a whole.
Remember:
- Mutual respect and inclusivity: Building a strong community requires mutual respect, open communication, and inclusivity. Embrace diverse perspectives, value individual contributions, and foster a collaborative environment where everyone feels heard and valued.
- Defined roles and responsibilities: As your community grows, consider establishing roles and responsibilities based on individual skills and strengths. This promotes efficient resource allocation and ensures everyone contributes their unique talents to the collective benefit.
- Regular communication and planning: Schedule regular meetings, discuss potential scenarios, and update your emergency plans together. Consistent communication strengthens your community's bond and ensures everyone is on the same page when facing challenges.
Community collaboration is not just about sharing resources; it's about building a collective safety net, a source of knowledge, and a wellspring of resilience. By joining forces with like-minded individuals, you can not only improve your individual preparedness but also build a stronger, more supportive network that thrives in the face of any uncertainty.

Image credit: Freepik
Frequently Asked Questions
Can prepping be done on a tight budget?
Absolutely! With strategic planning, resource management, and community collaboration, prepping can be accomplished on a tight budget. This guide provides insights into budget-friendly prepping.
How do I prioritize prepping expenses?
Start by creating a prepping budget. Identify essential items and allocate funds accordingly. Thrifty resource management and community collaboration can also help prioritize expenses effectively.
Is it possible to find affordable prepping gear?
Yes, there are plenty of affordable options for prepping gear. Look for sales, discounts, and consider second-hand options. DIY projects also offer a cost-effective way to acquire essential gear.
Can gardening contribute to budget-friendly prepping?
Absolutely. Cultivating a home garden provides a sustainable source of fresh produce, reducing reliance on store-bought items. It's a cost-effective way to enhance your food stockpile.
How can I build a budget-friendly food stockpile?
Smart grocery shopping, budget-friendly meal planning, and exploring discounted options can help you build a budget-friendly food stockpile. Prioritize long-lasting, nutrient-rich items.
Why is community collaboration important for budget prepping?
Forming a prepping community allows for collective purchasing power, resource-sharing, and mutual support. It eases the financial burden on individuals and enhances overall preparedness.
 Image credit: Freepik
Conclusion
Whether you choose to go it alone or join a community of preppers, remember: preparedness is not about fear, but about empowerment. It's about taking control of your future, honing your resourcefulness, and building resilience in the face of the unknown. So, take the first step, learn new skills, share your knowledge, and embrace the journey. Remember, a prepared individual is a strong individual, and a prepared community is an unbreakable fortress. The choice is yours, so choose to be ready. Choose to be prepared. Choose to build a future for yourself, your loved ones, and your community, a future where resilience reigns, collaboration triumphs, and the spirit of preparedness shines ever bright.